User guide#
Connecting to the platform#
You can access to the platform via the url: https://www.poliooutbreaks.com/login/
You can then enter in the dedicated fields your user name and password and click on “Login”:

If you have forgotten your password, you can generate a new one using the link “Forgot password”. The platform will ask your email and send out a link to reset your password.
Navigating the platform#
Accessing the Menu (non admin user)#
When connecting to the platform, you will by default land on the “Campaigns” page.
The “3-lines” button on the top left side allows you to access the menu, and it then appears as below:

Embedded links#
“Embedded links” provides a series of links to the different existing dashboards available, such as:
-
Preparedness dashboard
-
Vaccine supply
-
Analytics
-
Notification line list
Polio#
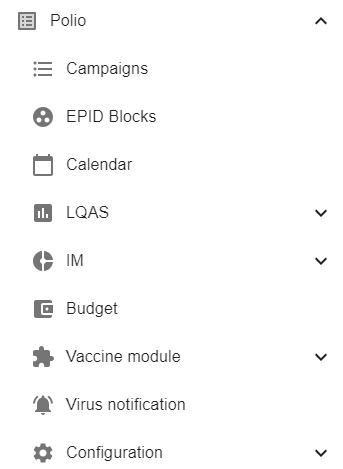
From the header “Polio” you can select the section you wish to consult:
-
Campaigns
- Dynamic interface where you can encode key data about past, ongoing or future Polio and integrated disease campaigns
-
EPID Blocks
- Allows you to group campaigns together in the platform (for instance, Malawi campaign with Mozambique, Zambia, and Zimbabwe)
-
Calendar
- Calendar view of the past, ongoing and future OBR planned, with the matching scopes map
-
LQAS
- Visualization of LQAS results per campaign and round with map view, graphs and tables
-
IM
-
Visualization of IM results per campaign and round with map view, graphs and tables with possibility to select:
-
IM in and out of households (results aggregated)
-
IM in households
-
IM out of households
-
-
-
Budget
- A budget monitoring tool for follow-up along the different steps of the budget process
-
Vaccine module
- Monitoring and modifying the supply chain, stock monitoring, and authorization of vaccinations
-
Virus notification
- The ability to manually enter or upload virus notifications across countries
More information on these different topics is provided in the following sections of this user guide.
Changing the language#
The platform today supports English and French languages.
In order to change language, via the menu, you can click on the bottom left on “English version” or “Version française”, and the choice of language will appear:

Campaigns tab#
In the “Campaigns” tab, you can:
-
Search and consult data for a given campaign (Polio and other), and complete/update data if necessary
-
Create a new campaign entry and encode key data about this campaign: OBR code, virus, vaccine type, scope, round dates, etc.
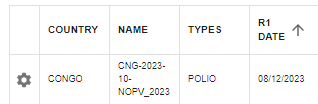
Browsing the different campaigns#

On the “Campaigns” page, you can use the filters on the upper part of the page to browse through the different campaigns already entered in the platform:
-
Search bar: allows you to search by keywords directly in the open field (for instance, the first letters of the OBR code)
-
Campaign category: select amongst the different types of campaigns available
-
Preventative
-
Regular
-
Test campaign/on hold
-
-
Country block: select the country block/region relevant to location the relevant campaign
-
Campaign type: identify which type of campaign/disease you would like to select
-
Polio
-
Measles
-
PIRI
-
Yellow Fever
-
Vitamin A
-
Rubella
-
Deworming
-
Big Catch-up
-
-
EPID block: if you are looking for campaigns that have been linked together in the platform, you can select directly the group of campaigns in the dropdown list
-
Country: select from the list the country of interest
-
R1 start date FROM: this will filter and show only the campaigns with round 1 start dates after the selected date
-
R1 start date TO: this will filter and show only the campaigns with round 1 start date before the selected date
When using the filters in the above part of the page, do not forget to click on the “Filter” black button on the right side to activate the filter(s).
To reinitialize, remove all conditions from the filter(s), and click again on “Filter” on the right side.
Downloading campaigns data#

On the “Campaigns” page, you can use the button “CSV” in order to download campaign data stored in the platform.
You can filter beforehand the data that you wish to download by using the filters, as detailed in the above section.
Creating a new campaign in the platform - required fields#
On the “Campaigns” page, click on the button “Create”.
A window then opens as below:
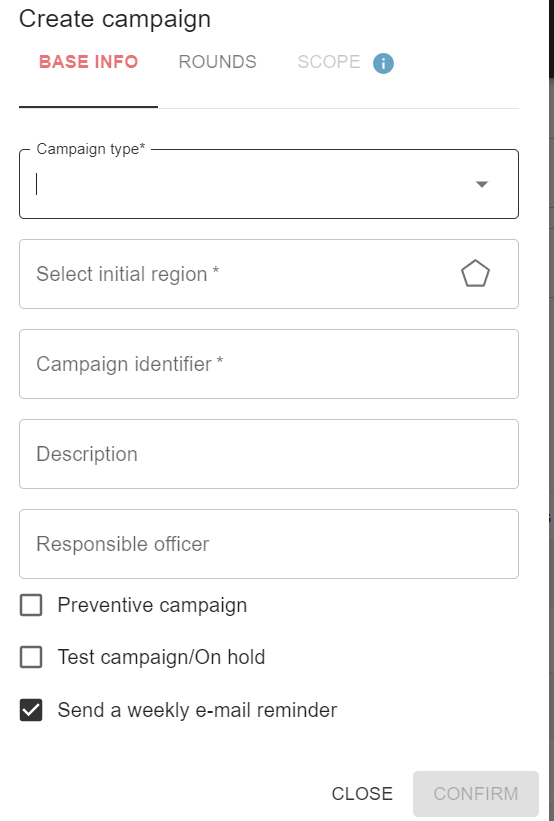
Please select the relevant campaign type.
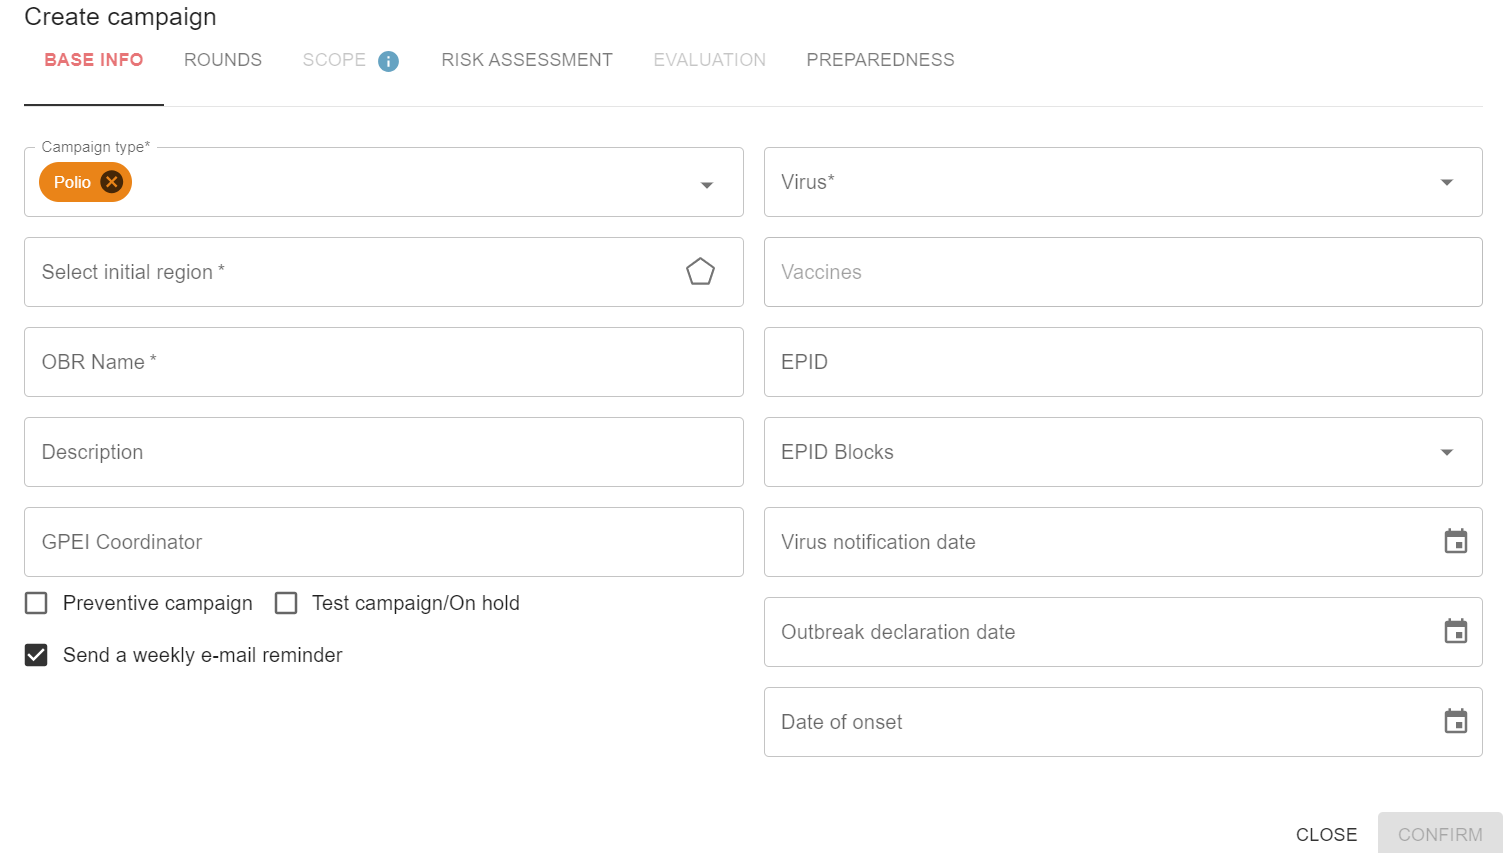
If Polio is selected, the following screen will appear:
In order to record a new campaign into the platform, four fields are required to complete:
-
Campaign type: what you have previously selected to decipher which disease you are encoding
-
OBR name: the code used to designate the campaign
-
Virus: the type of virus you are encoding
-
Initial region: please select the country where the campaign happened/will happen. You can also drill down through the pyramid and even select the district or health facility where the AFP was detected, using the tree view pyramid:

If a non-polio campaign is selected, the following window will appear:
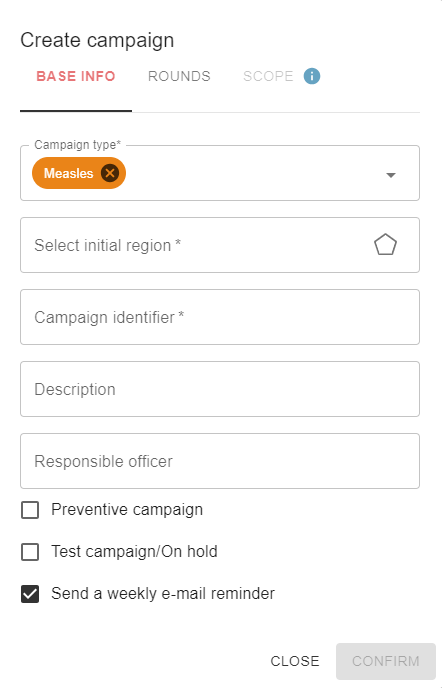
Please fill in the required fields of initial region and campaign identifier.
Once done, you can already save the polio or ‘other’ campaigns by clicking on “Confirm” at the bottom of the window, or continue editing and completing the information (see below the instructions).

If you prefer canceling the data entered, you can also click “Cancel” on the bottom of the window.

Filling data for a new campaign#
In order to continue filling in the campaign beyond the required fields, you may utilize the several tabs available to enter the key information per section:
-
Base info
-
Rounds
-
Scope
-
Risk assessment (only Polio)
-
Evaluation (only Polio)
-
Preparedness (only Polio)
For Polio campaigns, data entry goes as follows:
-
Base info
-
Campaign type: Polio
-
Virus: dropdown list with one-select
-
cVDPV
-
cVDPV2
-
cVDPV3
-
WPV1
-
-
Select initial region: the health pyramid of the country appears, and you can use the tree view to select the region/district or health facility where the AFP was first found
-
Vaccines: dropdown list with one-select
-
mOPV2
-
nOPV2
-
bOPV
-
-
OBR name: open field to enter the OBR code
-
EPID
-
Description: open field to enter information as needed about the campaign
-
EPID Blocks
-
if this campaign is to be linked to an existing campaign group, you can make that link here
-
if you need to create a new campaign group, then you need to go to the “EPID Blocks” section via the menu. See below for more details on how to create a new grouped campaign.
-
-
GPEI coordinator: you can enter the name of the GPEI coordinator in charge
-
Virus notification date: you can enter the matching date, using the calendar icon on the right or enter manually in the format DD/MM/YYYY
 )
) -
Outbreak declaration date: you can enter the matching date, using the calendar icon on the right or enter manually in the format DD/MM/YYYY (
) -
Date of onset: you can enter the matching date, using the calendar icon on the right (
)
or enter manually in the format DD/MM/YYYY -
You can also indicate the type of campaign, if that is a “Preventive campaign”, or a “Test campaign” (used for training purposes with the Vaccine stock dashboards). For this, tick the boxes accordingly:
 style="width:3.36458in;height:0.35417in" />
-
The platform allows the sending of weekly reminders to > configured recipients (See Admin management section of this > user guide for more details on how to configure the emails per > country) . You may also tick the box accordingly.
-
-
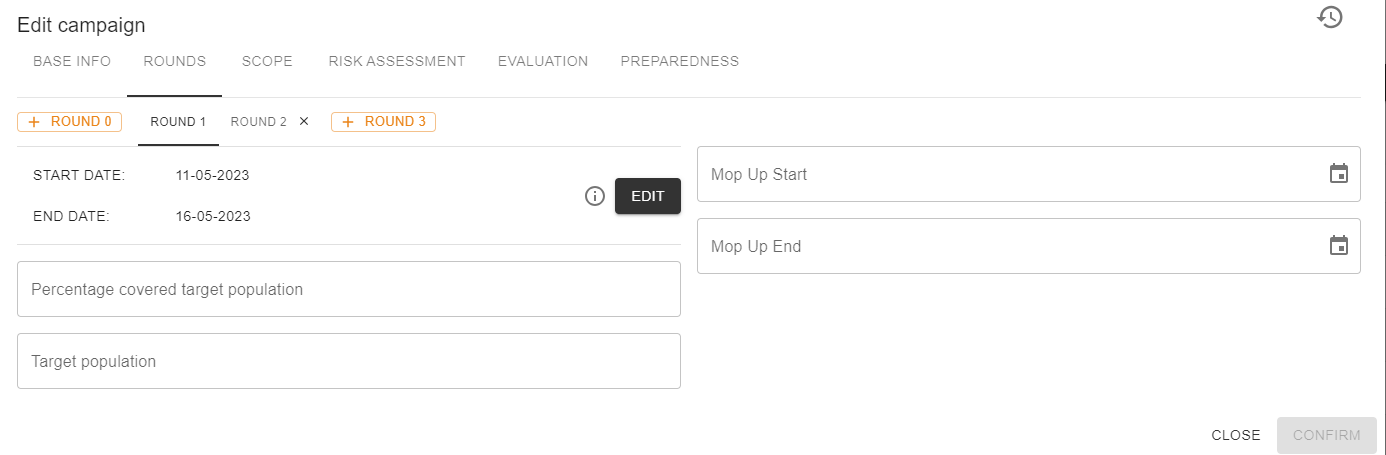
Rounds
When clicking on the “Rounds” tab, you can first edit the number of rounds for the campaign by using the buttons just below the window tabs:

For instance, if there is a round 0 in the given campaign, you can click on the orange button “+ round 0”. If there is no round 0, and that you would like to enter data for the “Round 1”, click on the orange button “+ Round 1”. The platform will then show the fields available for round 1:
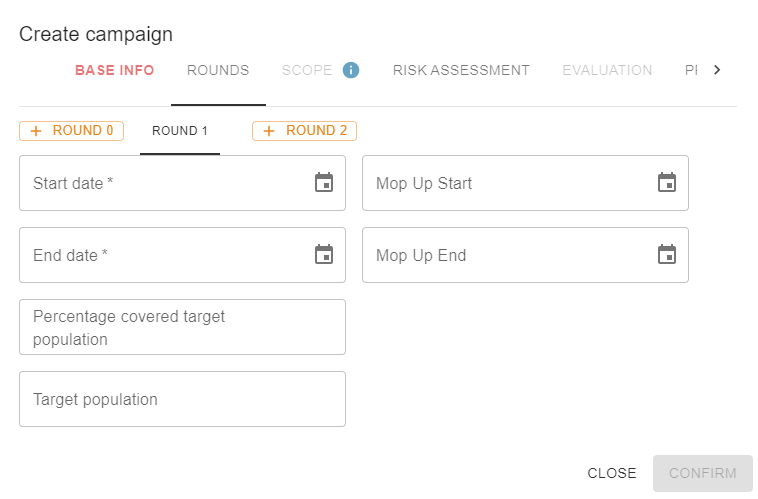
You can then add another round as needed by clicking on the orange button “+ round 2”:

The platform will then show the fields available for round 2, which are standardized for each round.
The same principle applies to add as up to 6 rounds for a given campaign.
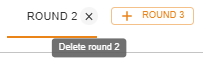
If you added an extra round by mistake, you can delete it using the ‘x’ next to the round tab.
Please note that when creating a round, start date and end date are mandatory to input.
-
Start date: you can enter the matching date, using the calendar icon on the right (
)
or enter manually in the format DD/MM/YYYY -
Mop up start date: you can enter the matching date, using the calendar icon on the right (
)
or enter manually in the format DD/MM/YYYY -
End date: you can enter the matching date, using the calendar icon on the right (
)
or enter manually in the format DD/MM/YYYY -
Mop up end date: you can enter the matching date, using the calendar icon on the right (
)
or enter manually in the format DD/MM/YYYY -
Percentage covered target population: input the percentage of the target population covered
-
Target population: input total population targeted in round
Once the data entered, you can click on the black button “confirm” on the right side of the window in order to save data:

The platform also records any alterations made to the start dates of the rounds, along with the corresponding reasons for these adjustments. This can be accomplished by clicking on the "Edit" option located at the right side from the previous starting dates:
Upon clicking, a new window will appear, presenting to the user three mandatory fields: the "new" start date, the "new" end date, and an explanation detailing the rationale behind this modification:
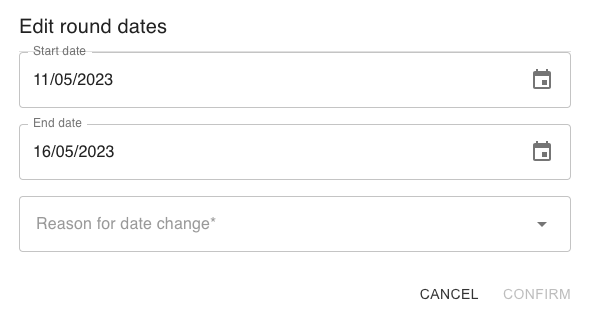
The existing reasons encompass the following:
-
Campaign moved forward by MOH
-
Campaigns synchronization
-
Decision from MoH
-
Delayed to observe public holiday
-
Encoding Error
-
Four weeks gap between rounds to be respected
-
Funds not arrived in country
-
Funds not received at operational level
-
Preparedness level no reached
-
Heavy rain/flooding
-
Integrate with other vaccination activities
-
Other vaccination campaigns
-
Pending liquidation of previous SIA funding
-
Political decision
-
Preparedness level not reached
-
Security context
-
Vaccine not arrived in country
-
Vaccine not delivered at operational level
-
VRF not signed
-
Scope
You can select directly on the map the scope of the vaccination campaign:
By default, you will be selecting district by district.
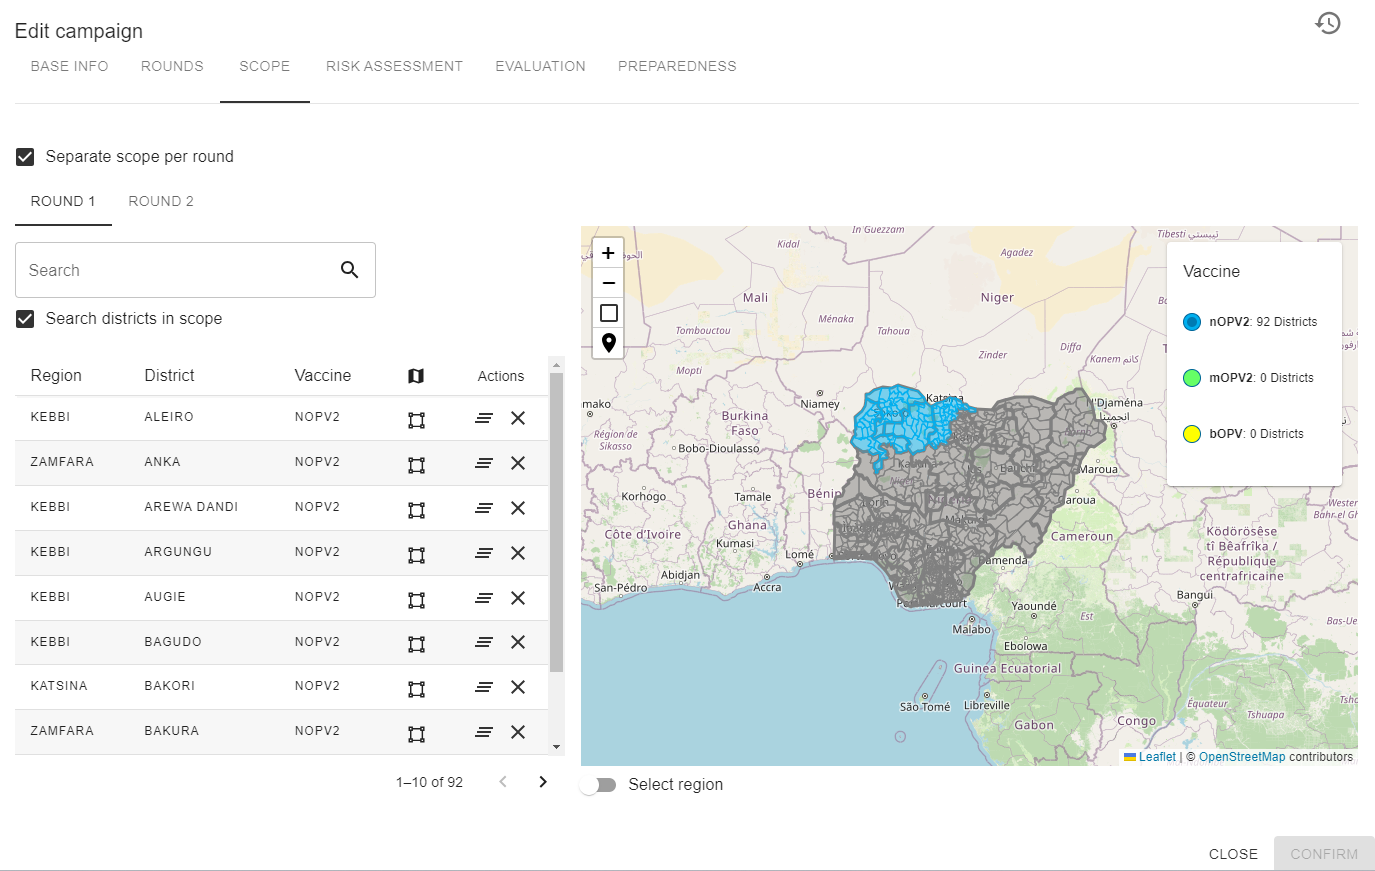
In order to select regions, you can activate the button on the bottom:
The selected scope appears as a list on the left side of the window:
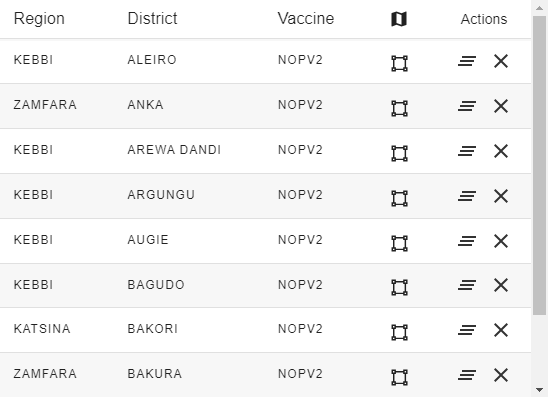
You can adjust the selection by using the buttons that appear next to each district:
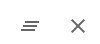
The first one ( ) unselects the whole region,
the other one (
) unselects the whole region,
the other one ( ) unselects the district in
question.
) unselects the district in
question.
-
Risk Assessment
-
Field investigation date: you can enter the matching date, using the calendar icon on the right (
)
or enter manually in the format DD/MM/YYYY -
Outbreak declaration date: you can enter the matching date, using the calendar icon on the right (
)
or enter manually in the format DD/MM/YYYY -
1st draft Submission date: you can enter the matching date, using the calendar icon on the right (
)
or enter manually in the format DD/MM/YYYY -
RRT/ORPG approval date: you can enter the matching date, using the calendar icon on the right (
)
or enter manually in the format DD/MM/YYYY -
Verification Score: enter a figure
-
Doses requested (both rounds): enter the number of doses requested
-
-
Evaluation
-
IM start: you can enter the matching date, using the calendar icon on the right (
)
or enter manually in the format DD/MM/YYYY -
IM end: you can enter the matching date, using the calendar icon on the right (
)
or enter manually in the format DD/MM/YYYY -
LQAS start: you can enter the matching date, using the calendar icon on the right (
)
or enter manually in the format DD/MM/YYYY -
LQAS end: you can enter the matching date, using the calendar icon on the right (
)
or enter manually in the format DD/MM/YYYY -
Main reason for non-vaccination: open field to enter information on the main reason for non vaccination
-
% children missed in households: enter the percentage
-
% children missed out of households: enter the percentage
-
% children missed in+out of households: enter the percentage
-
Awareness of campaign planning: enter the percentage
-
-
Preparedness
Generate a new spreadsheet by clicking on the button “Generate a spreadsheet”. By default the spreadsheet is generated in the preferred language set up in the “Configuration” part, where admins can also designate automatic email recipients.
By doing so, a link then appears in the field “Preparedness Google Sheet
URL”. You can access it by clicking on the access icon on the right

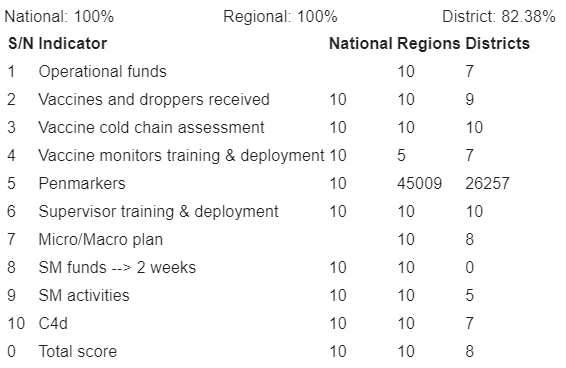
The platform imports the data on a daily basis and updates the below table accordingly:
Upon the user's confirmation of the modifications within the date editing window and subsequent changes to the campaign window, the calendar will be promptly updated to reflect the adjustments.
EPID Blocks Tab#
In this tab, you can group together existing campaigns on the platform.
Please be aware that campaigns need to have been created beforehand in the tab “Campaigns” in order to be grouped together.
The page displays as below:
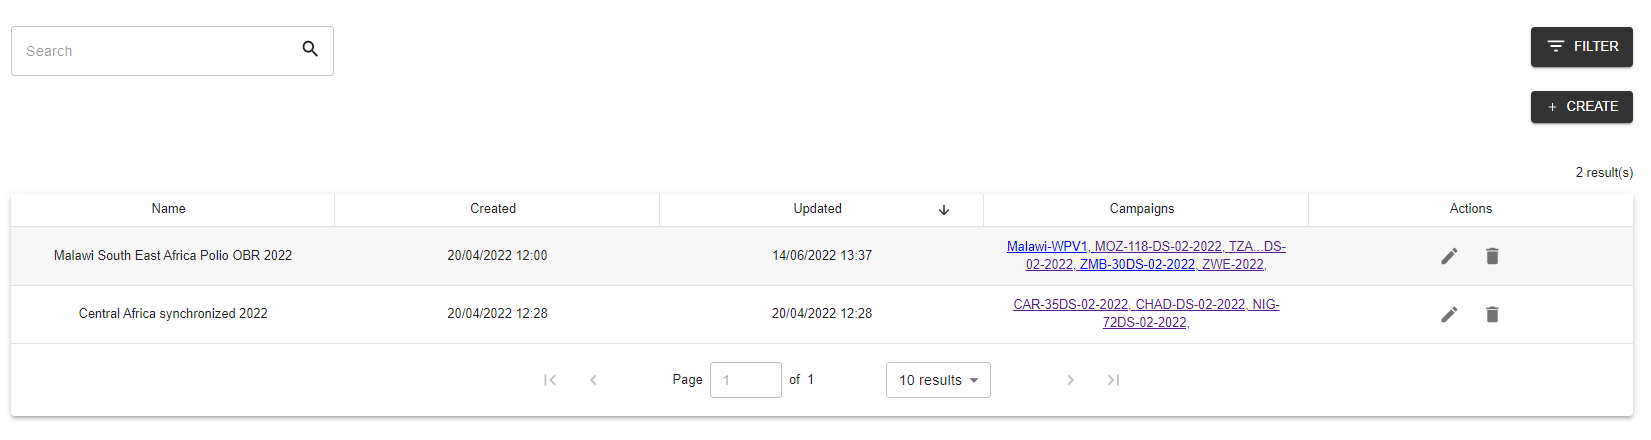
You can use the Search bar to look for grouped campaigns by key words.
Creating a new group of campaigns#
You can create a new group by clicking on “Create” on the right hand side. A pop up window appears.
In the field “Name”, you can name the group of campaigns as needed. In the field “Campaigns to link”, you can multi-select in the dropdown the campaigns to be linked together:
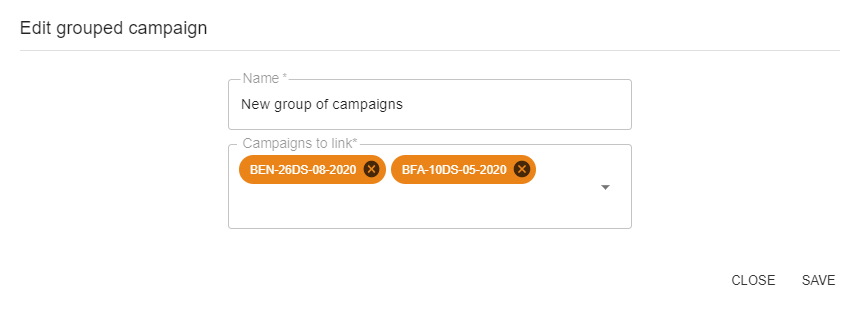
You can then click on “Save” to record the group or click on “Close” to cancel.
Calendar tab#
The calendar allows you to have an overview of the past, ongoing and future campaigns planned, with the matching scopes appearing on the map on the right.
This calendar displays the data entered in the “Campaigns” tab of the platform.
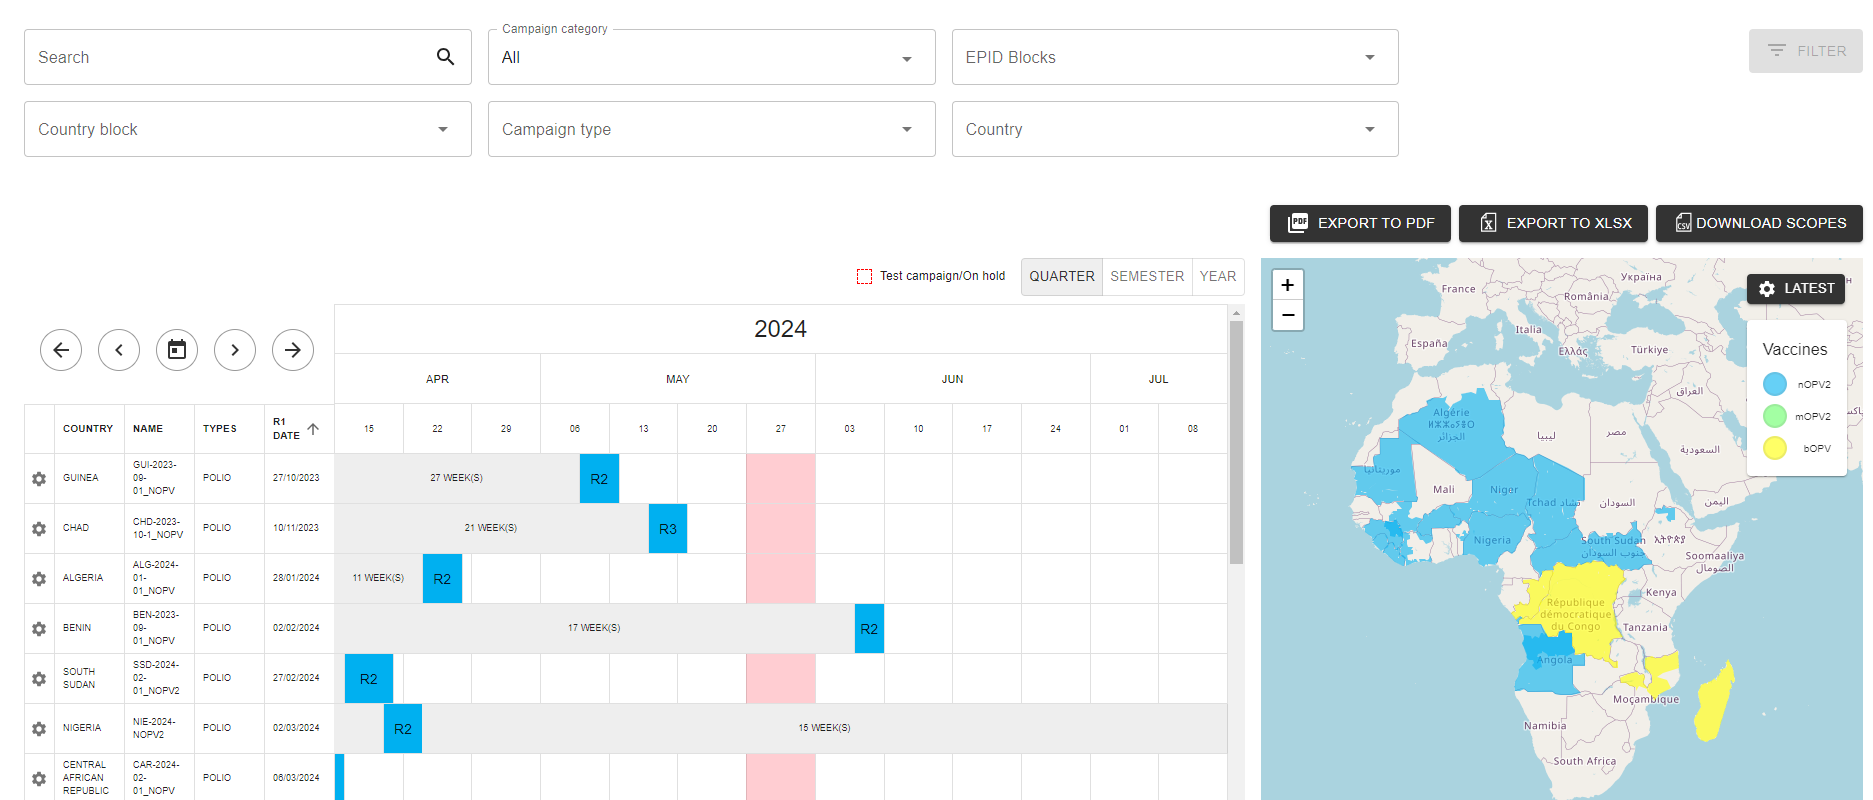
Filtering campaigns to display#
You can use the filters at the top of the page to select certain campaigns to show on the calendar below.
-
Search bar: it allows you to look for keywords in the open field
-
Campaign category: you can select in the dropdown:
-
Preventive
-
Regular
-
All
-
-
EPID Blocks: you can select in the dropdown a group of campaigns you wish to see in the calendar
-
Country Blocks: select the block you would like to view
-
Campaign type: select the campaign type you would like to view
-
Polio
-
Measles
-
PIRI
-
Yellow Fever
-
Vitamin A
-
Rubella
-
Deworming
-
Big Catch-up
-
-
Country: you can select in the dropdown the country you wish to see campaigns for
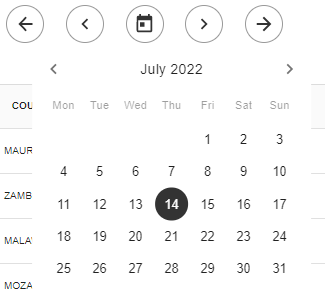
Browsing dates in the calendar#
The calendar displays by default the campaigns by quarter. You may select to also view by semester or by year by selecting the given tab.

You can also navigate the calendar dates using the arrows:
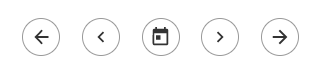
Or by selecting a specific date by pressing the center calendar button.
Editing campaigns from the calendar#
On the calendar, if you have admin rights, you can edit directly the campaign shown by clicking on the settings button on the left side:
You can also display more information about the precise round dates, target population, preventative status, and descriptions by hovering on the colored box embodying the round of a given campaign:
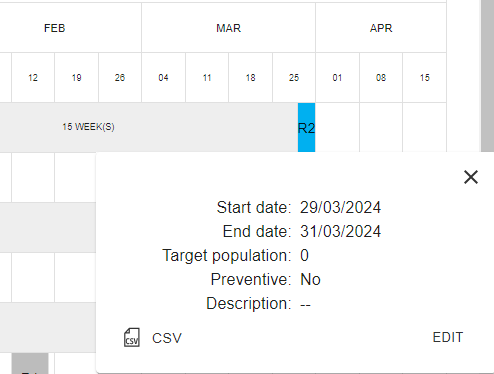
You can download the data of that campaign by clicking on “CSV”. The CSV file contains the following columns:
-
ID
-
Admin 2
-
Admin 1
-
Admin 0
-
OBR Name
-
Round Number
-
Vaccine
You can also click on “Edit” in order to access the data entry part of the platform and modify data about campaigns.
Using the calendar map#
The map on the right side of the calendar displays the scopes of the campaigns that are displayed for the given date chosen. The scopes have different colors, depending on the vaccine types.
If you zoom on the map, you can see more precisely the details of the shapes of the districts selected in the scope. You can hover on the different districts to be able to read more information:

Campaign evaluation#
LQAS tabs#
The LQAS tab allows you to consult in direct the results of LQAS surveys after a polio campaign has happened.
For this, you need to first:
-
In the field “Country”, select the country of interest in the dropdown
-
In the field “Campaign”: select the campaign of interest in the dropdown
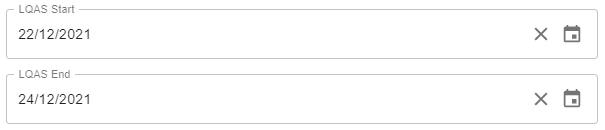
The start date and end date displayed next to the Round are the dates filtering the results:

These can be adjusted using the “LQAS start date” and “LQAS end date” in the platform. For this, you can access directly the edition part using the button here:

Then go to the “Evaluation” tab and adjust the below dates:
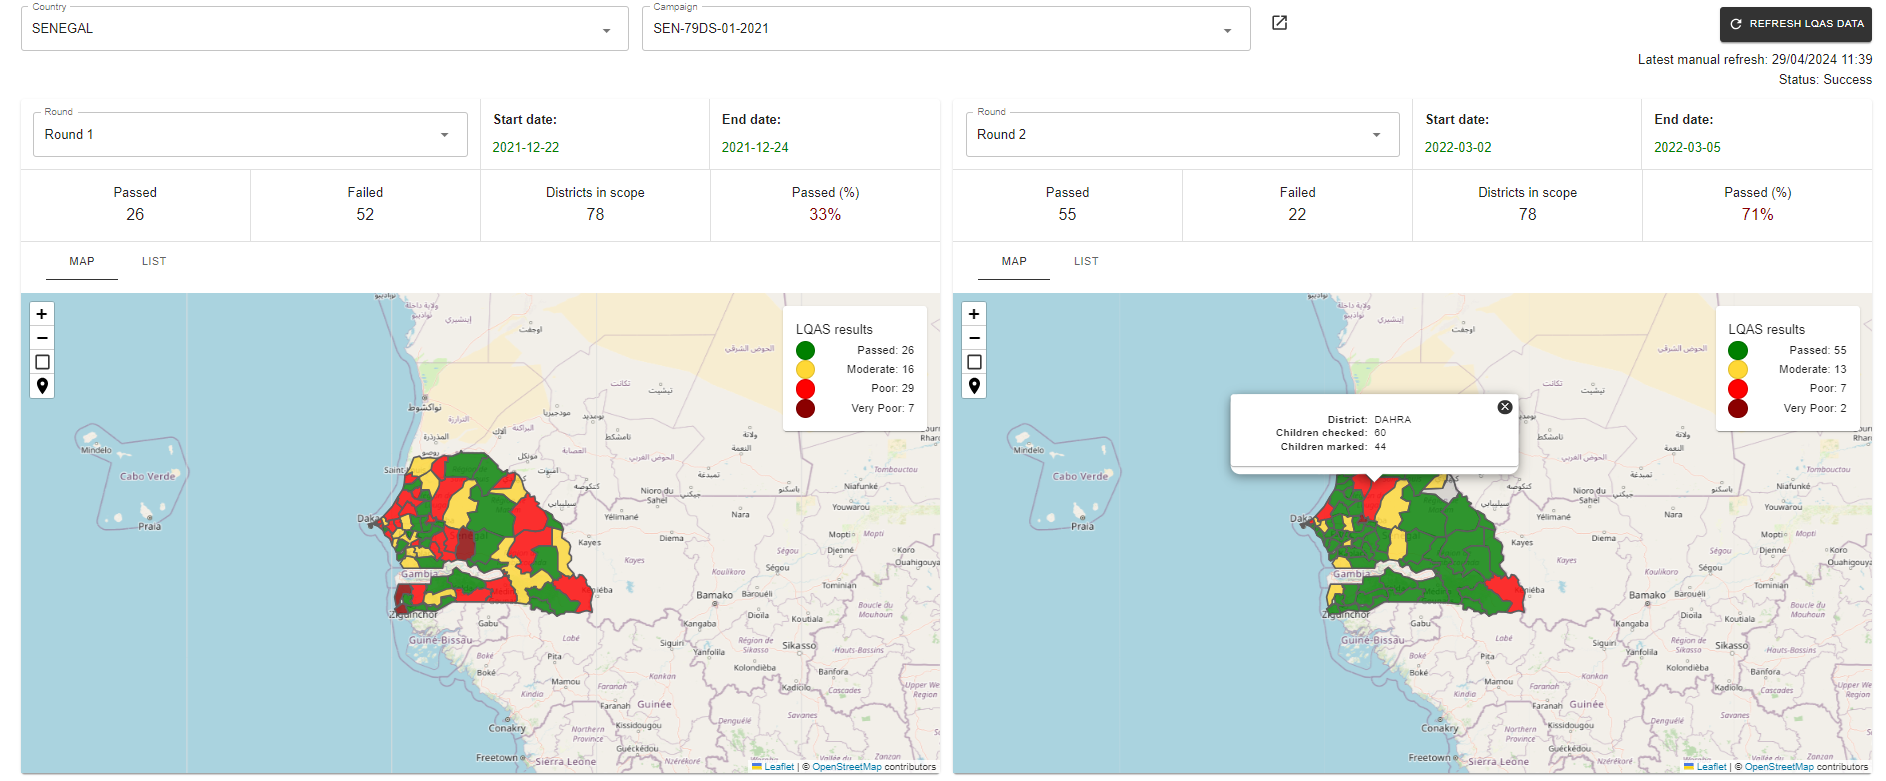
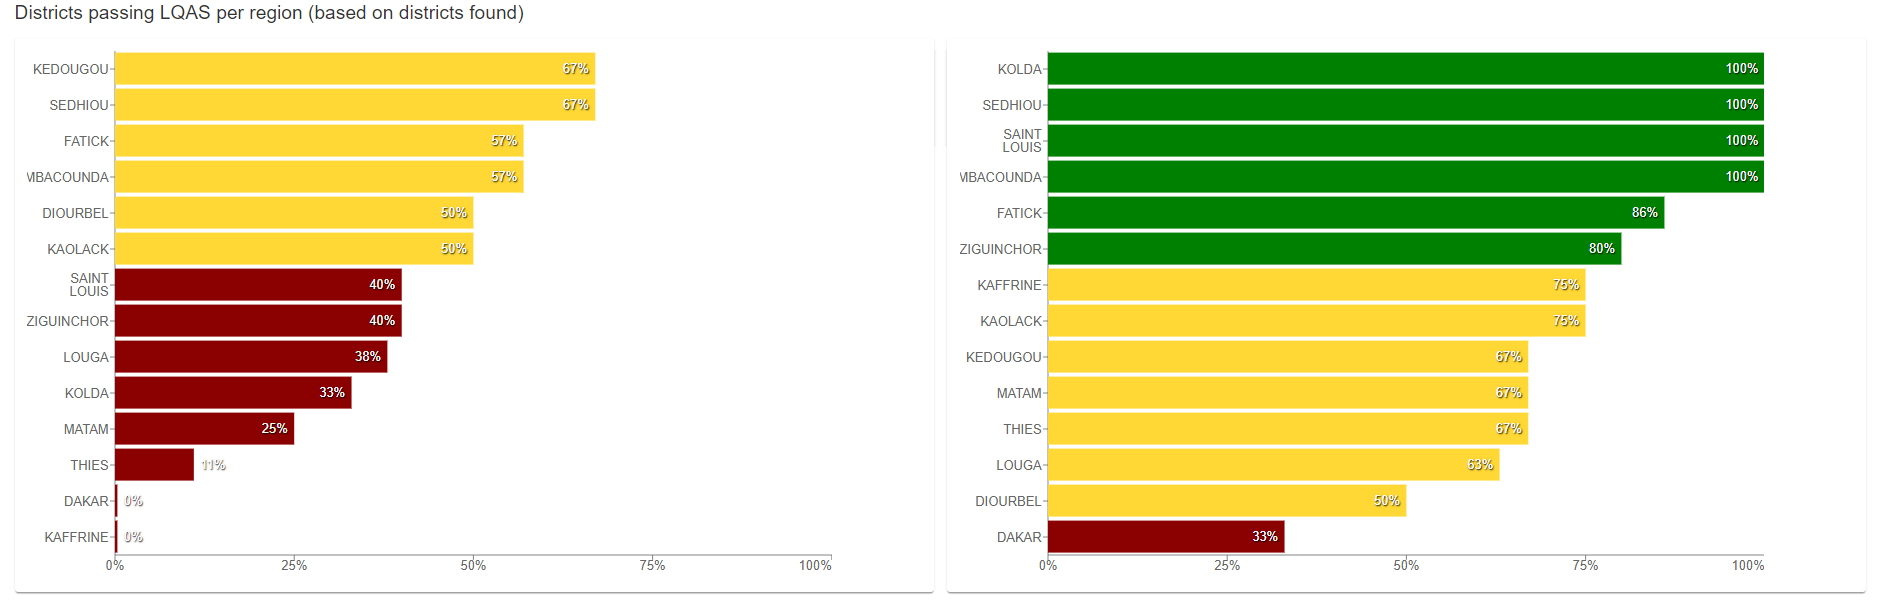
Here is an overview of the display of information.
On the map, colors appear to dictate the following results:
-
High Performance: \< 4 missed children
-
Moderate SIA Performance: 4-8 missed children
-
Poor SIA Performance: 9-19 missed children
-
Very Poor SIA Performance: ≥ 20 missed children
The percentage of districts passing is calculated taking into account the districts that were disqualified.
In order to access and download the LQAS raw data per country, please utilize the WHO-AFRO-Polio workspace. Only invited users have access to this workspace, please reach out to Bluesquare should additional users be added.
IM tabs#
The IM tab is divided into three parts:
-
IM global, which is the aggregation of IM in households and IM out of households results
-
IM in households, which displays only the IM results that were conducted in households
-
IM out of households, which displays only the IM results that were conducted out of households
The same principles apply for the 3 parts of IM. This IM tab allows you to consult in direct the results of IM surveys after a polio campaign has happened.
For this, you need to first:
-
In the field “Country”, select the country of interest in the dropdown
-
In the field “Campaign”: select the campaign of interest in the dropdown
The start date and end date displayed next to the Round are the dates filtering the results:
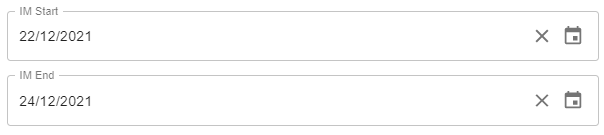
These can be adjusted using the “IM start date” and “IM end date” in the platform.
For this, you can access directly the edition part using the button here:
Then go to the “Evaluation” tab and adjust the below dates:
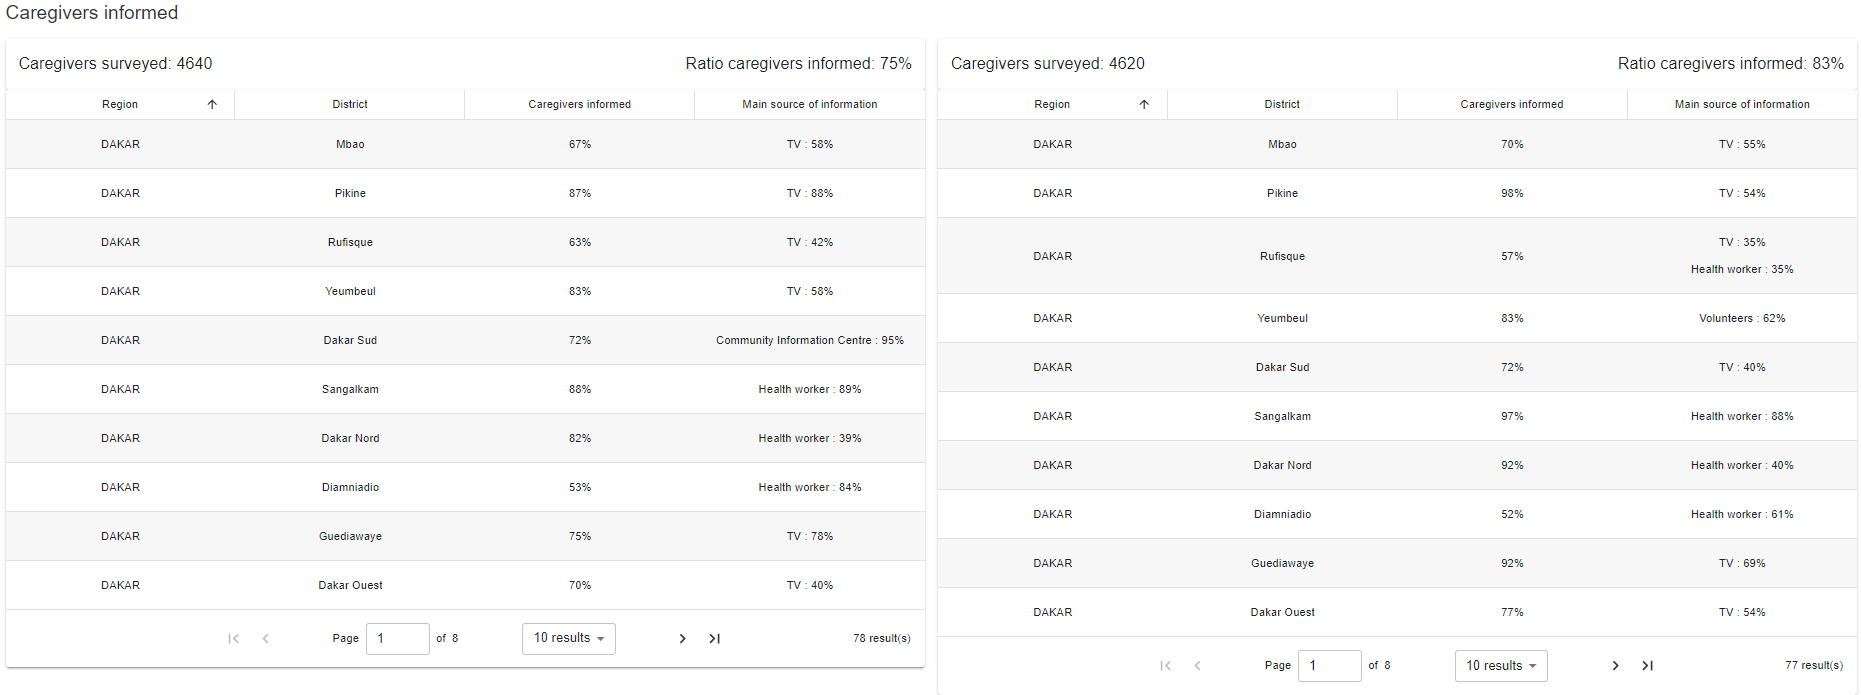
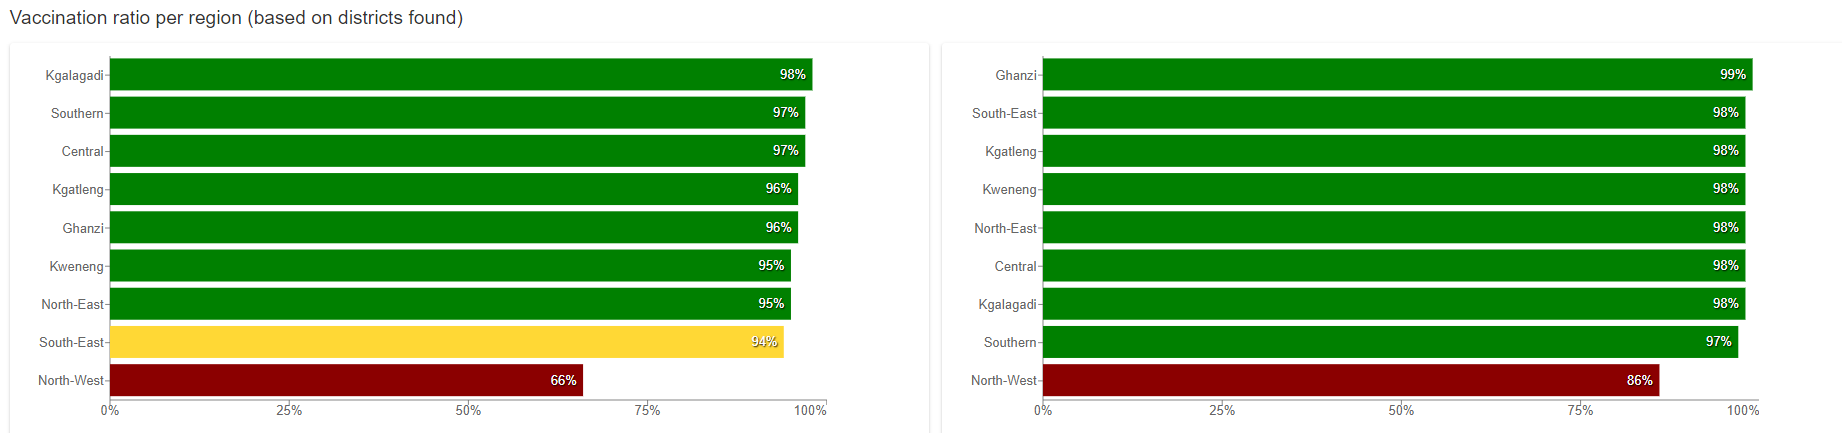
Here is an overview of the display of information.
For IM Global, the map and graph are available:

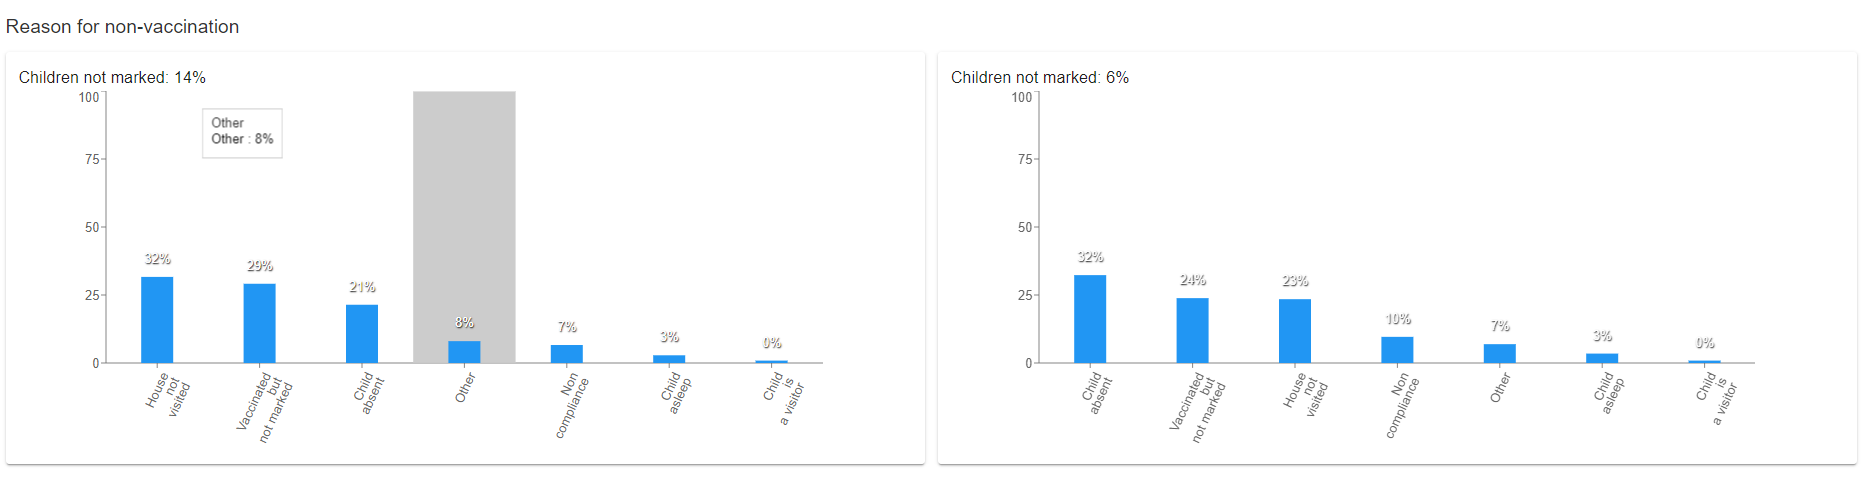
For IM in households and out of households, more information is available such as reason for non-vaccination:
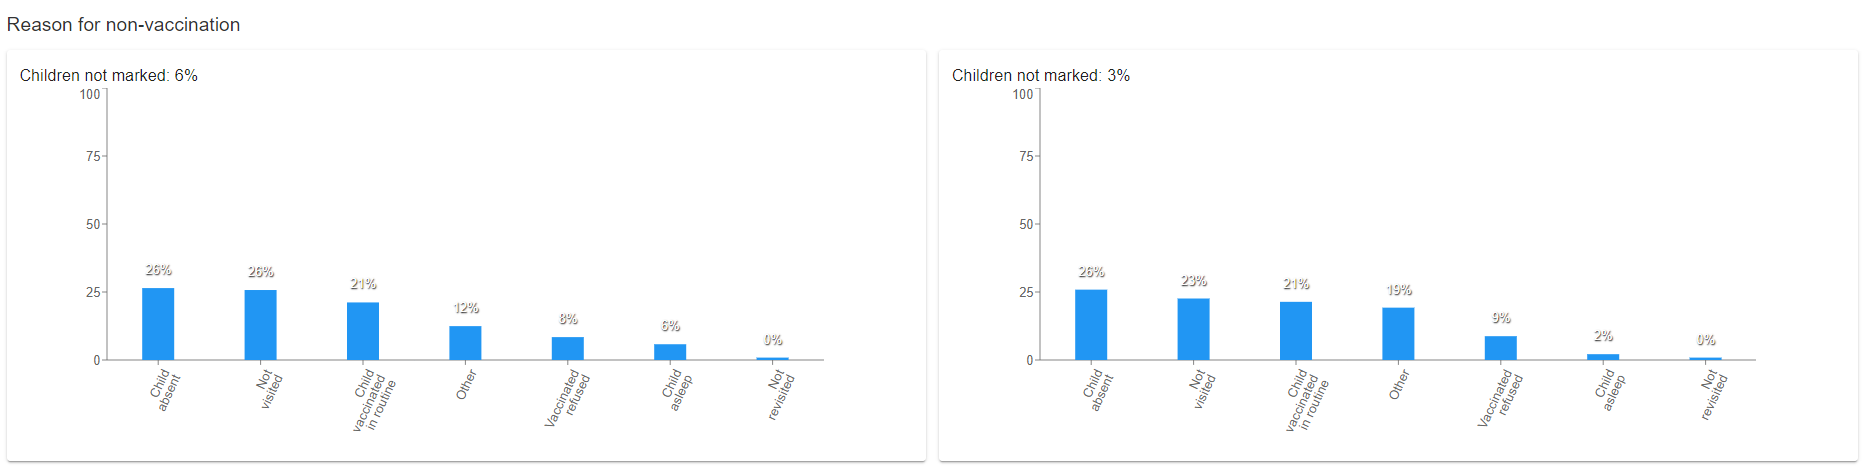
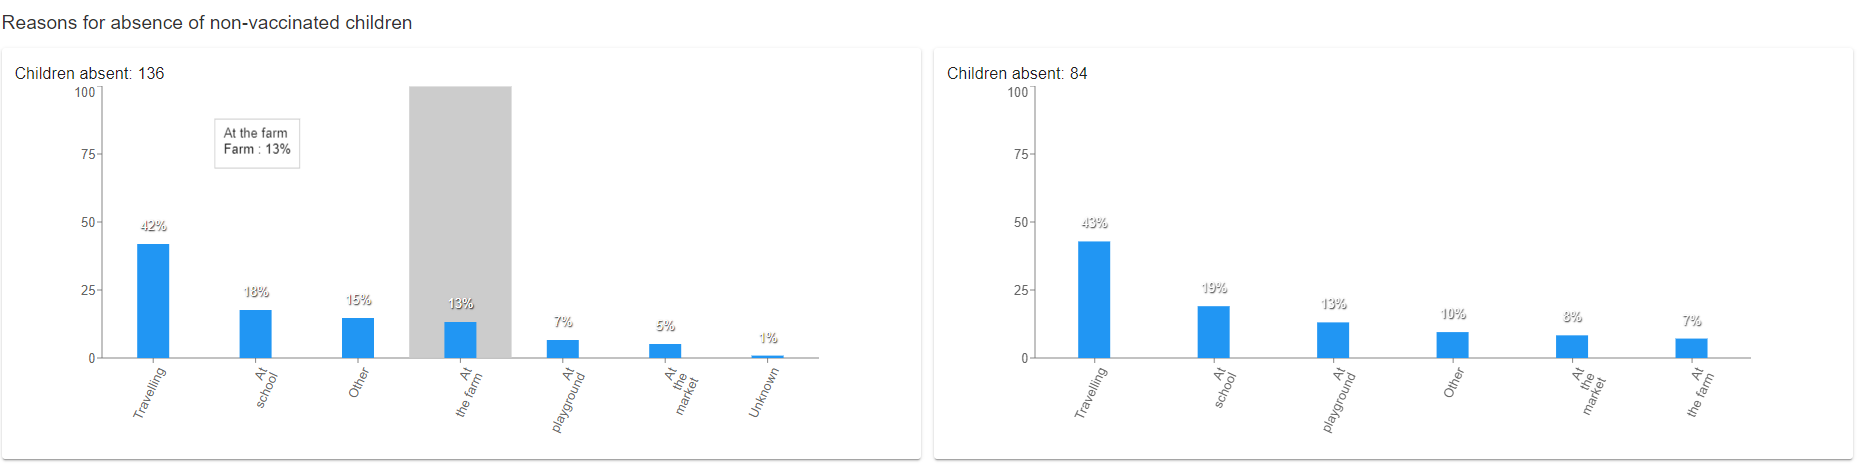
And reason of absence of non-vaccinated children:
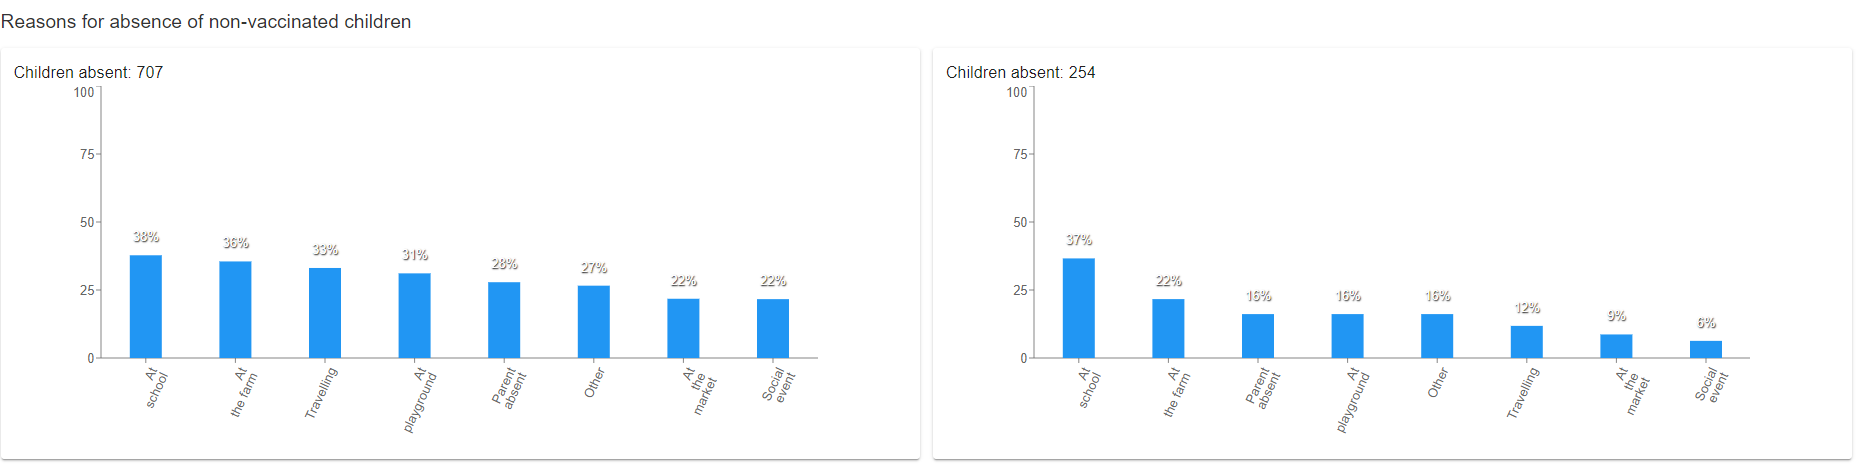
In order to access and download the IM raw data per country, please utilize the WHO-AFRO-Polio workspace. Only invited users have access to this workspace, please reach out to Bluesquare should additional users be added.
LQAS/IM admin information#
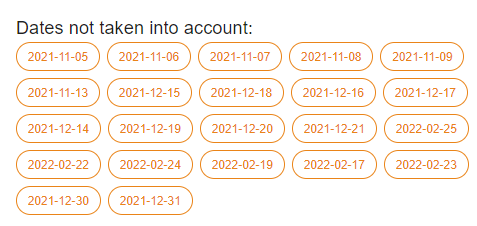
The dashboard displays information filtered according to the dates indicated in the platform for LQAS and IM.
When there is data available for other dates which are not in the range of start and end date selected, they appear at the bottom of the page as below:
Similarly, when the health pyramid of the ODK form does not exactly match with the health pyramid in the platform, the districts are shown as below, also at the bottom of the page:
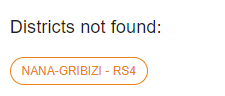
For these districts not matching, the data will not appear properly.
Ongoing efforts are being done by Bluesquare to debug these in order to avoid any issue reading the data.
Budget Tool#
Bluesquare has developed a budget monitoring tool within the Polio platform. The goal is to have the possibility to make a dedicated follow-up along the different steps of the budget process, including the modifications in such budgets, the feedback from different members of teams, and the approval from the stakeholders.
It is accessible to users involved in the budget process as viewers or editors, depending on the budget status at that moment. You may utilize the different filters at the top of the page to navigate the tool. The search bar allows you to search using keywords, Country block provides you a selection of regions to filter, the country tab provides you a dropdown list of countries, while the status filter allows you to select the relevant campaign budget status from a dropdown list.

In addition, the user will have the possibility to filter alphabetically in the campaign table, according to the OBR Name, Country, Status, and Round and in terms of dates according to the last step done.

Users may download a CSV of the OBR of interest by clicking the CSV icon at the top right. You may utilize the filters to decipher which campaign(s) you would like to download.

By clicking into action (the eye button), the user will access the budget process to that campaign. This new window contains the following information:
Budget Status#
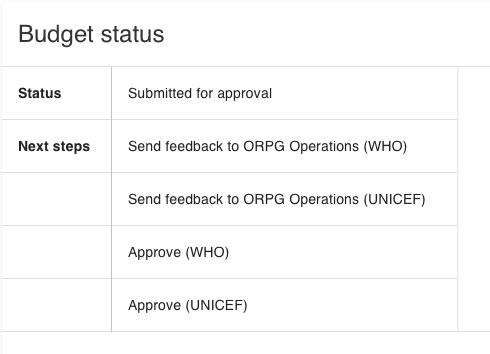
In the upper side, the user can find status and next steps:
-
The status shows the step where the budget is at that moment of the process,
-
The section "next steps" show the possibilities of users entitled to step the action,
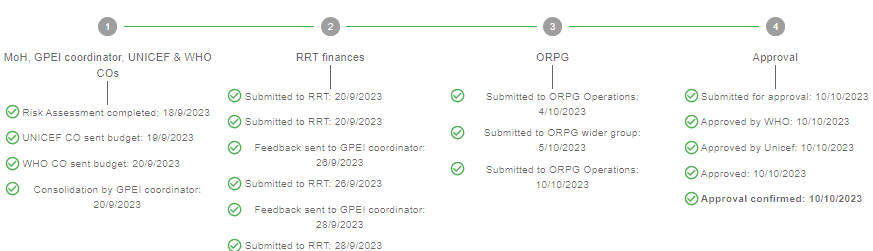
Budget Progress Bar#
The Progress Bar shows all the steps included in the budget process. Once the steps are completed, the check symbol becomes green, and the date is included.
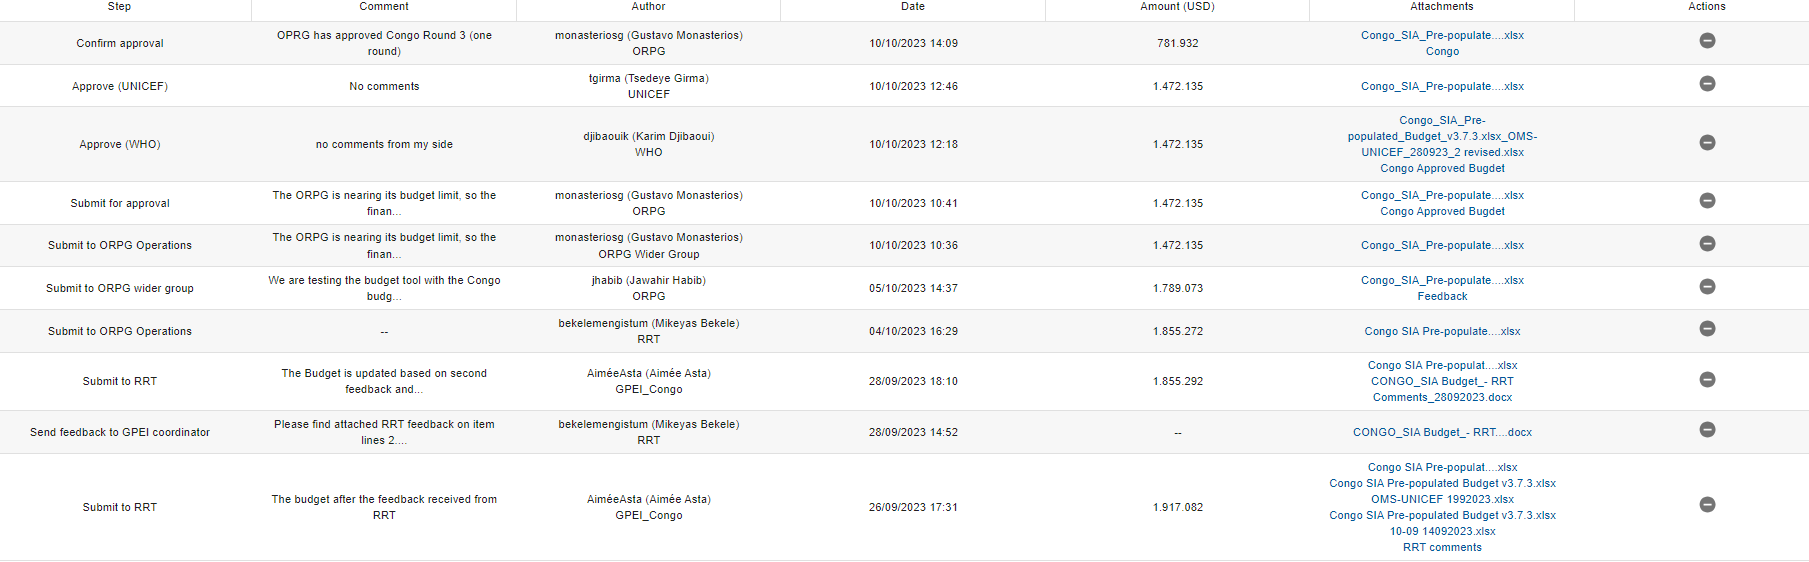
Budget Steps#
More detailed information about the steps are shown below in the table, where every step is organized in columns according to the name of the step, the comments included, the author, date of creation, the amount of the budget (in USD), and attachment included in that step (accessible by clicking the link).
Planning a New Budget Process#
In order to plan a new budget process, select the button on the top
right corner 
This will open a new data entry window as seen below

Please insert the country, campaign, and round from the dropdown list. Once saved, the budget process may begin with the respective teams involved - this can be done manually by entering the data in the below fields, or by following the step-by-step procedure of respective teams involved.
The four tabs at the bottom consist of the following:
-
Budget approval
-
Budget request
-
Risk assessment completed
-
WHO CO sent budget
-
UNICEF CO sent budget
-
GPEI coordinator consolidated budgets
-
-
RRT review
-
Submitted to RRT
-
Feedback sent to GPEI coordinator
-
Resubmitted to RRT
-
-
ORPG review
-
Submitted to ORPG Ops
-
Feedback sent to RRT
-
Resubmitted to ORPG Operations
-
Submitted to ORPG wider
-
Submitted to ORPG OPs (ORPG wider)
-
Feedback sent to RRT 2
-
Resubmitted to ORPG Operations (ORPG wider)
-
-
Approval
-
Submitted for approval
-
Feedback requested by UNICEF
-
Feedback requested by WHO
-
Approved by WHO
-
Approved by UNICEF
-
Approved
-
Approval confirmed
-
-
-
Funds Release
-
Payment mode:
-
Disbursed to CO (WHO) date:
-
Disbursed to MOH (WHO) date
-
Disbursed to CO (WHO) date
-
Disbursed to MOH (UNICEF) date
-
Disbursed to CO (UNICEF) date
-
District Count
-
No Regret Fund
-
-
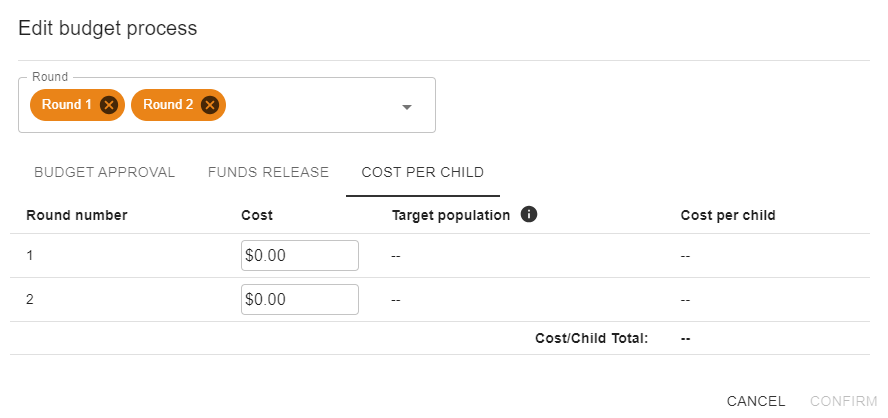
Cost per child
Vaccine Module#
Bluesquare has developed a vaccine module within the Polio platform. The goal is to have the possibility to make a dedicated follow-up along the different steps of the vaccine supply chain, vaccine stock management, and vaccine authorization, including the modifications in such processes.
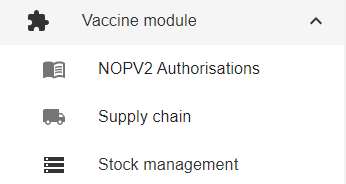
It is accessible to users involved in the vaccine management and vaccine supply chain processes as viewers or editors, and by country. It can be accessed from the menu, via a dedicated tab:
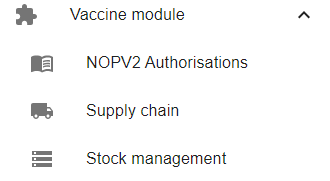
The module has three parts, one related to vaccine authorization, one to the vaccine supply chain, and another about vaccine stock management.
Vaccine Authorization#
This window is dedicated to the nOPV2 and the respective information about the agreement on customs clearance by country and the status of the current authorization.
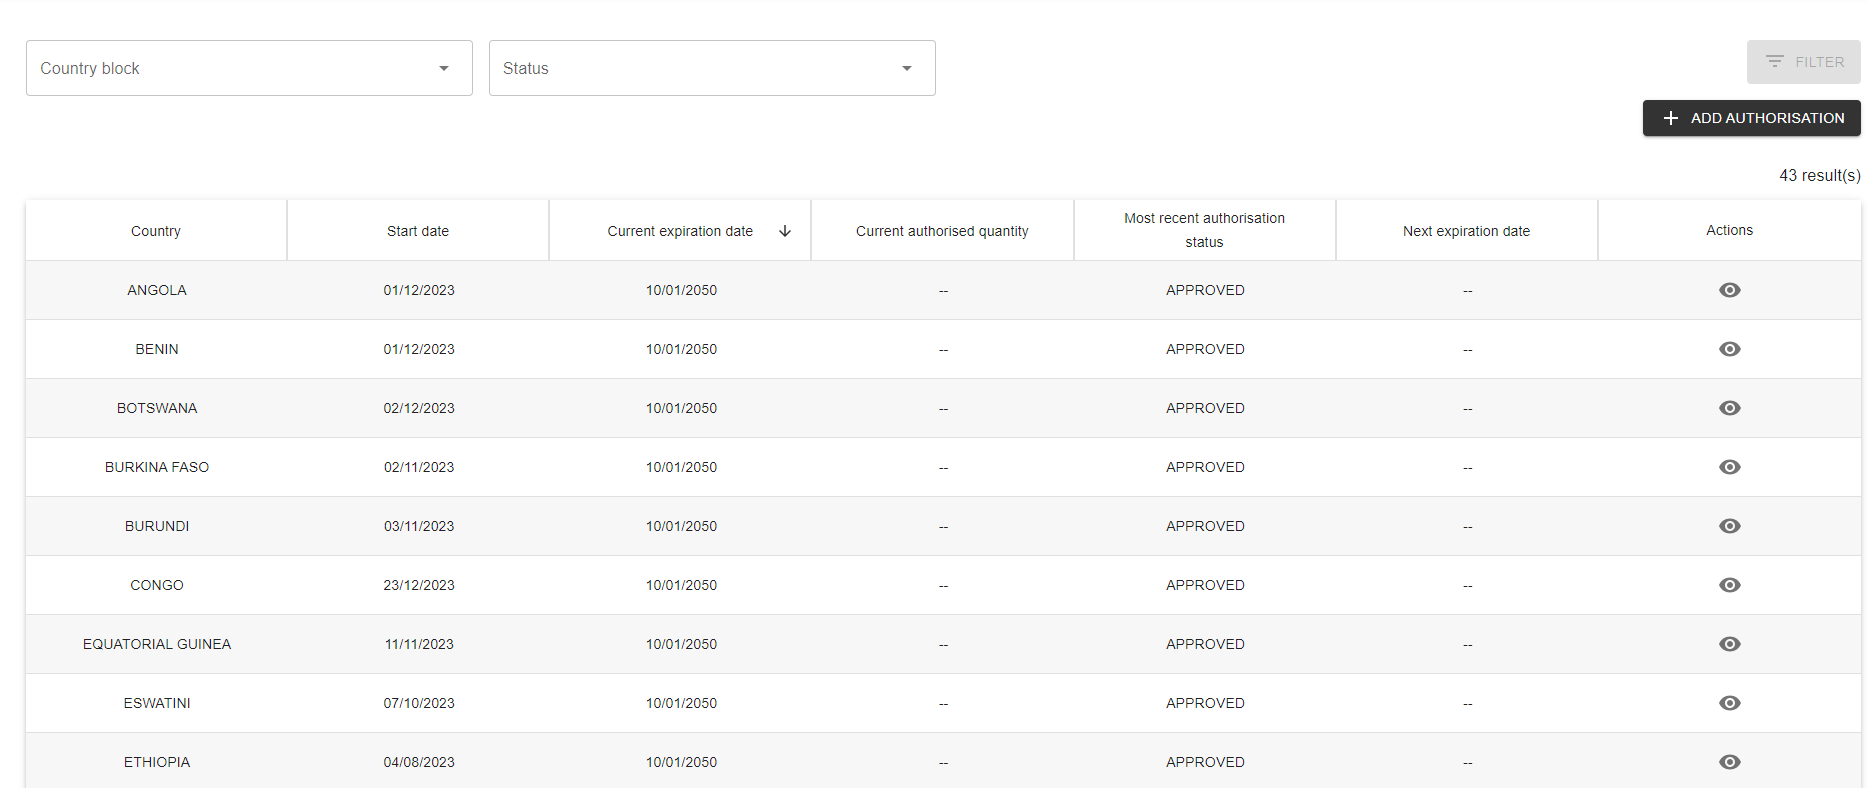
This provides the possibility to view the historical data per country, edit and add a new authorization. You may utilize the filters at the top of the page to identify certain country-blocks and statuses to view.

Adding an Authorization
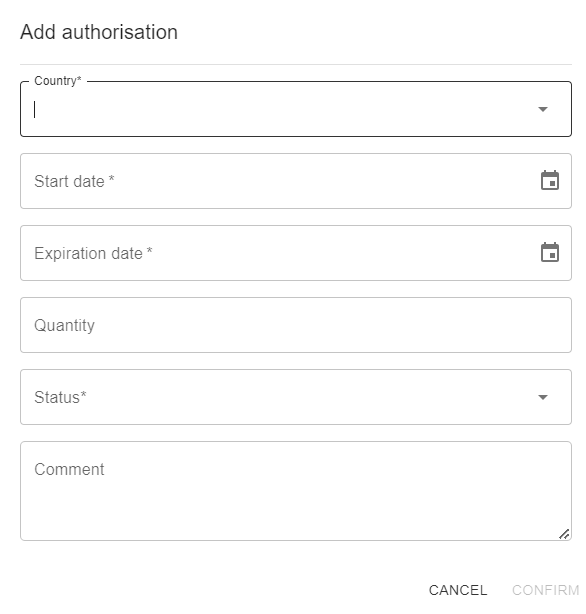
In order to create a new authorization, press the button at the top right corner ‘Add Authorization’

The pop-up below will appear. You may enter the following fields:
-
Country: select the country of interest from the dropdown (mandatory field to enter)
-
Start Date: you can enter the matching date, using the calendar icon on the right (
)
or enter manually in the format DD/MM/YYYY (mandatory field to
enter) -
Expiration date: you can enter the matching date, using the calendar icon on the right (
)
or enter manually in the format DD/MM/YYYY (mandatory field to
enter) -
Quantity: open field to enter the quantity
-
Status: select from the dropdown the current status
-
Ongoing
-
Signature
-
Approved
-
Expired
-
-
Comment: an open field for any other information you would like to include
Once completed, you may confirm your new authorization.
To edit authorizations, simply click the eye icon on the far right column.
Vaccine Supply Chain#
This page allows the user to create, edit and monitor the supply chain of vaccine deliveries, including the relevant vaccine request forms, pre-alerts, and vaccine arrival reports associated with the different rounds of campaigns.
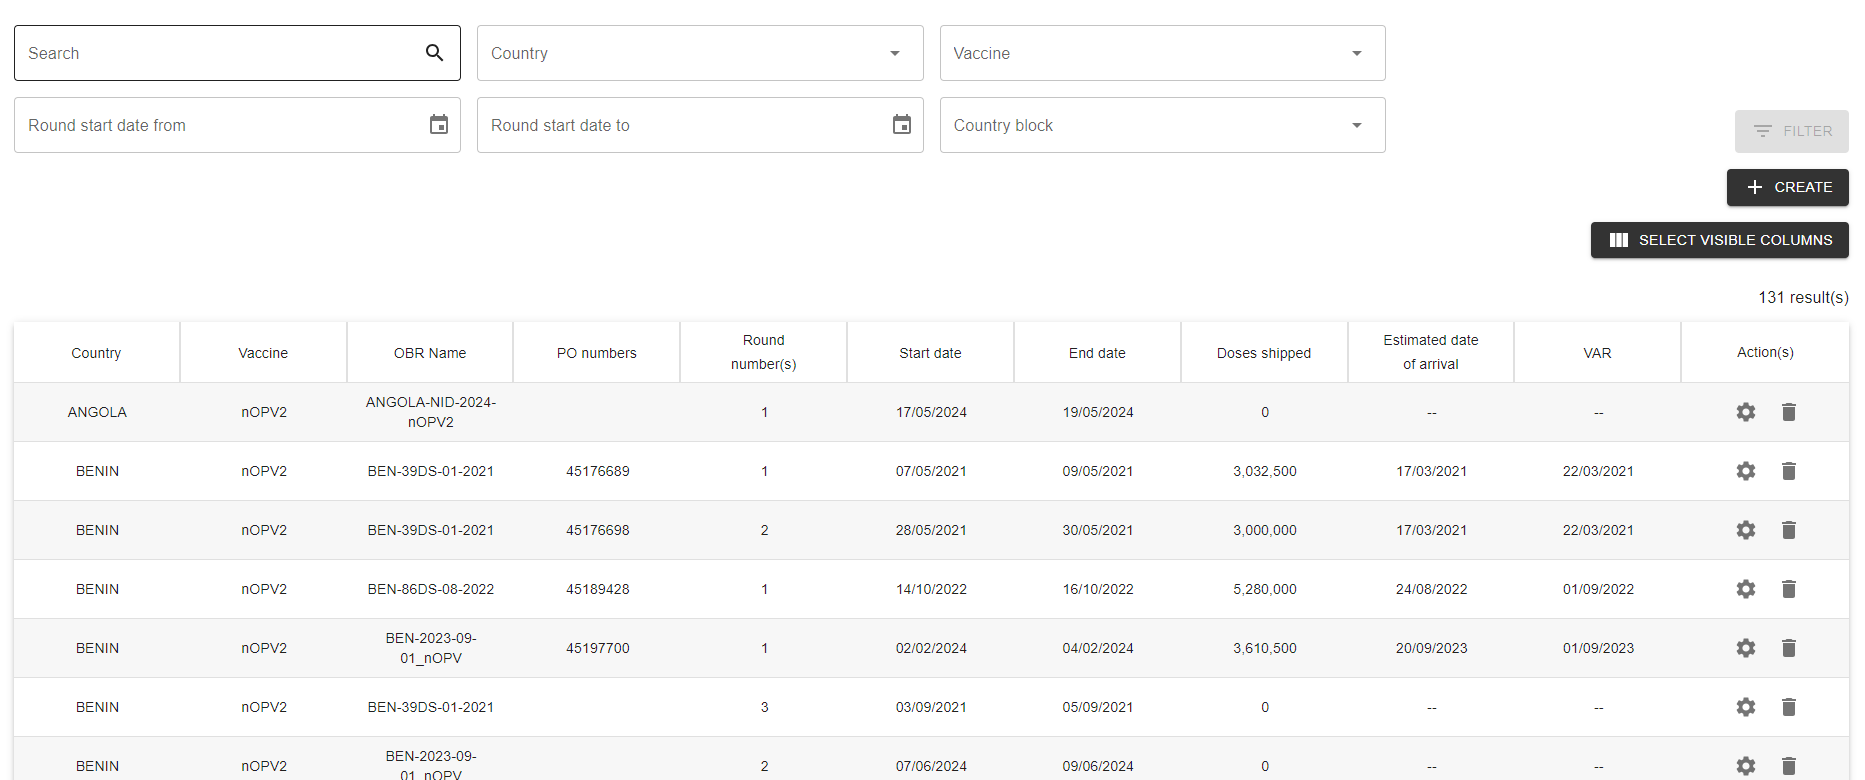
The filters at the top of the page allow the user to search for relevant keywords in the search bar, select the country of interest and/or the country block, choose a particular vaccine type, in addition to input the round start and end dates.

Creating a New entry
In order to create a new entry, select the create icon at the top right
of the screen.
The following window will open, allowing you to input the data for the three tabs:
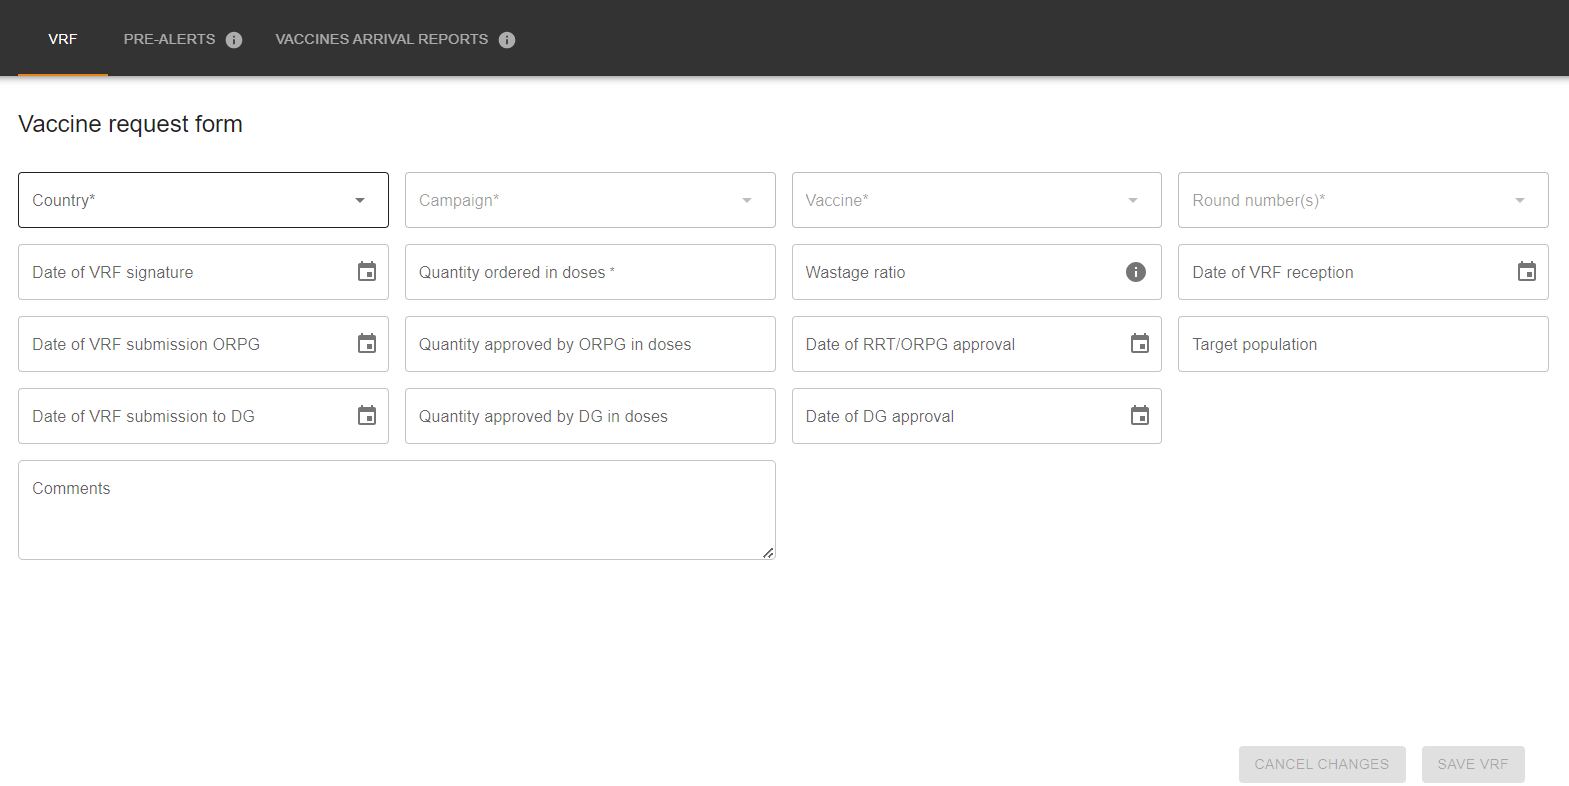
VRF (Mandatory to input prior to Pre-alerts and VAR creation)
-
Country: select the country of interest from the dropdown (mandatory field to enter)
-
Campaign: select the relevant campaign (mandatory)
-
Vaccine: choose the vaccine type (mandatory)
-
Round number: select the correct round number(s) (mandatory)
-
Quantity ordered in doses: enter the number of doses ordered in this open field (mandatory)
-
Wastage ratio: enter percentage
-
Quantity approved by ORPG in doses: enter amount
-
Quantity approved by DG in doses: enter amount
-
Target population: enter target population
-
For the following fields, enter the matching date, using the calendar icon on the right (
)
or enter manually in the format DD/MM/YYYY-
Date of VRF signature
-
Date of VRF reception
-
Date of VRF submission ORPG
-
Date of RRT/ORPG approval
-
Date of VRF submission to DG
-
Date of DG approval
-
Once the relevant information is inputted, please select ‘Save VRF’ at the bottom of the window, in order to unlock the following tabs for Pre-Alerts and Vaccines Arrival Reports.
Pre-Alerts
In order to create a new pre-alert, navigate to the second tab at the top named ‘Pre-Alerts’.

Please select the icon ‘Add Pre Alert’ at the top right
The following pop up will be created for data entry:

-
Pre-alert reception: enter the matching date, using the calendar icon on the right (
)
or enter manually in the format DD/MM/YYYY (mandatory field to
enter) -
PO number: insert the relevant PO number in the open field (mandatory)
-
Estimated arrival date: enter the matching date, using the calendar icon on the right (
)
or enter manually in the format DD/MM/YYYY (mandatory field to
enter) -
Doses shipped: enter the amount of doses shipped ni this open field (mandatory)
Save the Pre-Alert at the bottom right of the screen. You may keep adding more pre-alerts for the relevant campaign round by repeating these steps.
Vaccine Arrival Reports
In order to create a new VAR, navigate to the third tab at the top named ‘Vaccines Arrival Reports’.

To create an associated VAR, select the icon ‘Add VAR’ at the top right

-
PO number: enter PO number, or select the relevant PO that pops up, based on the information previously filled in Pre-Alerts (mandatory)
-
Arrival report date: enter the matching date, using the calendar icon on the right (
)
or enter manually in the format DD/MM/YYYY (mandatory field to
enter) -
Doses shipped: pre-filled based on data entered in Pre-Alerts tab, alternatively enter the number of doses shipped
-
Doses received: enter number of doses received
Save the VAR at the bottom right of the screen. You may keep adding more VARs for the relevant campaign round by repeating these steps.
To edit entries, simply click the settings icon on the far right column of the home ‘Supply Chain’ page. You may additionally utilize the trash icon should an entry need to be deleted.
Vaccine Stock Management#
Associated data from the Supply Chain module automatically populates to the Stock Management portion of the platform. Navigate to stock management via the third tab of the Vaccine Module in the platform menu on the left.
The following window displays the stock management of vaccines per vaccine and country.
The filters at the top of the page allow the user to search for relevant keywords in the search bar, select the country of interest and/or the country block, and choose a particular vaccine type

Creating a new entry
You may create a new country entry by selecting the ‘Create’ icon at the top right.
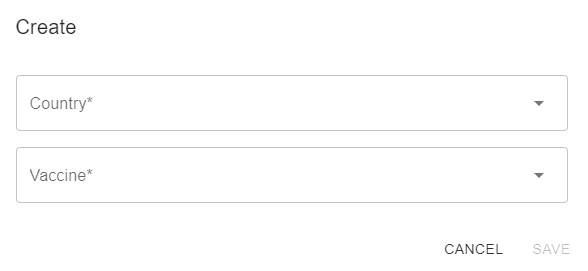
The following pop up will appear. Please enter the country of interest and the relevant vaccine type, and save your selection.
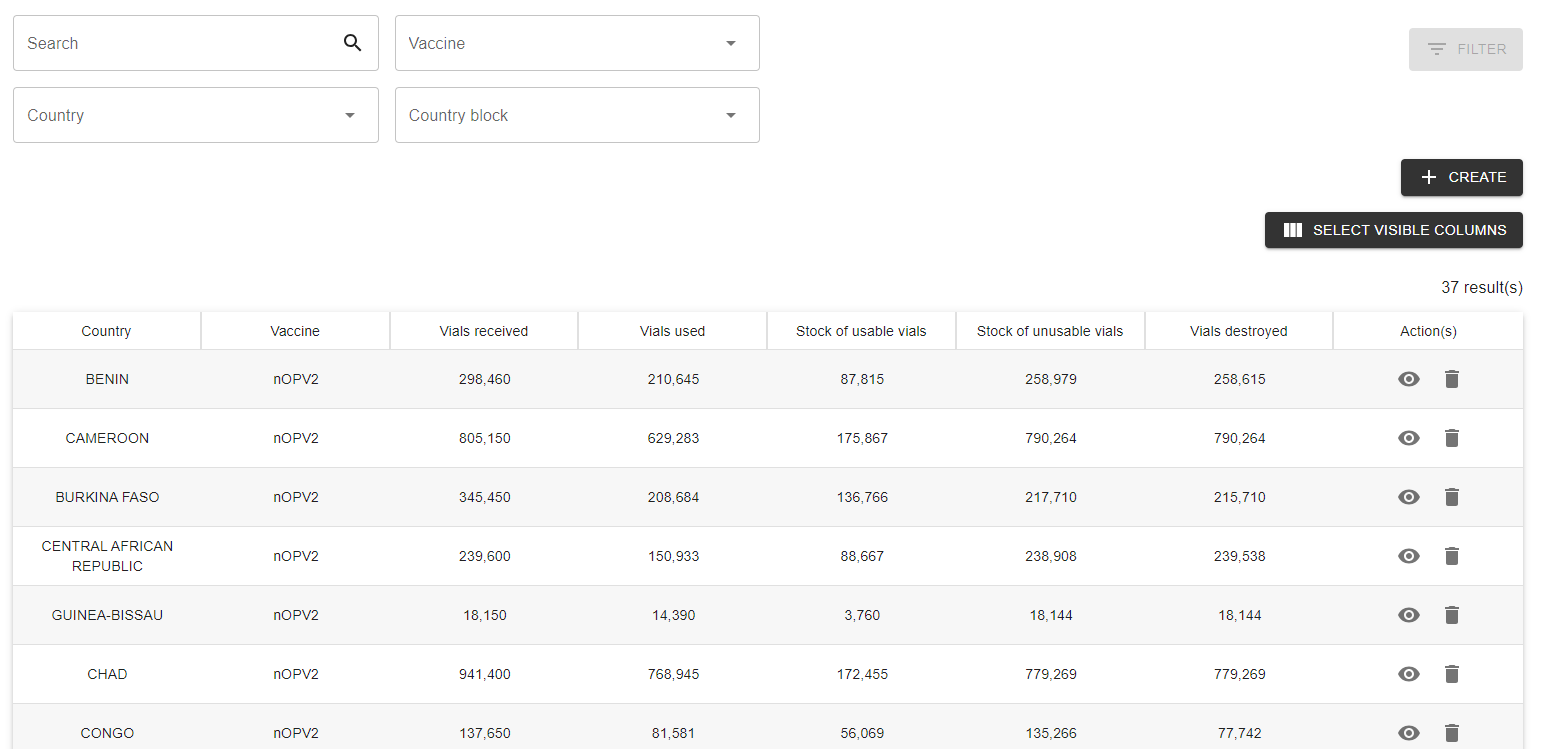
You will then be brought to the following window to view, edit, or create the stock variation entries for the given country & vaccine type.

To edit, view, or create a new stock variation please press on the icon at the top right ‘Stock Variation.
This will bring to the following window with three tabs to input:

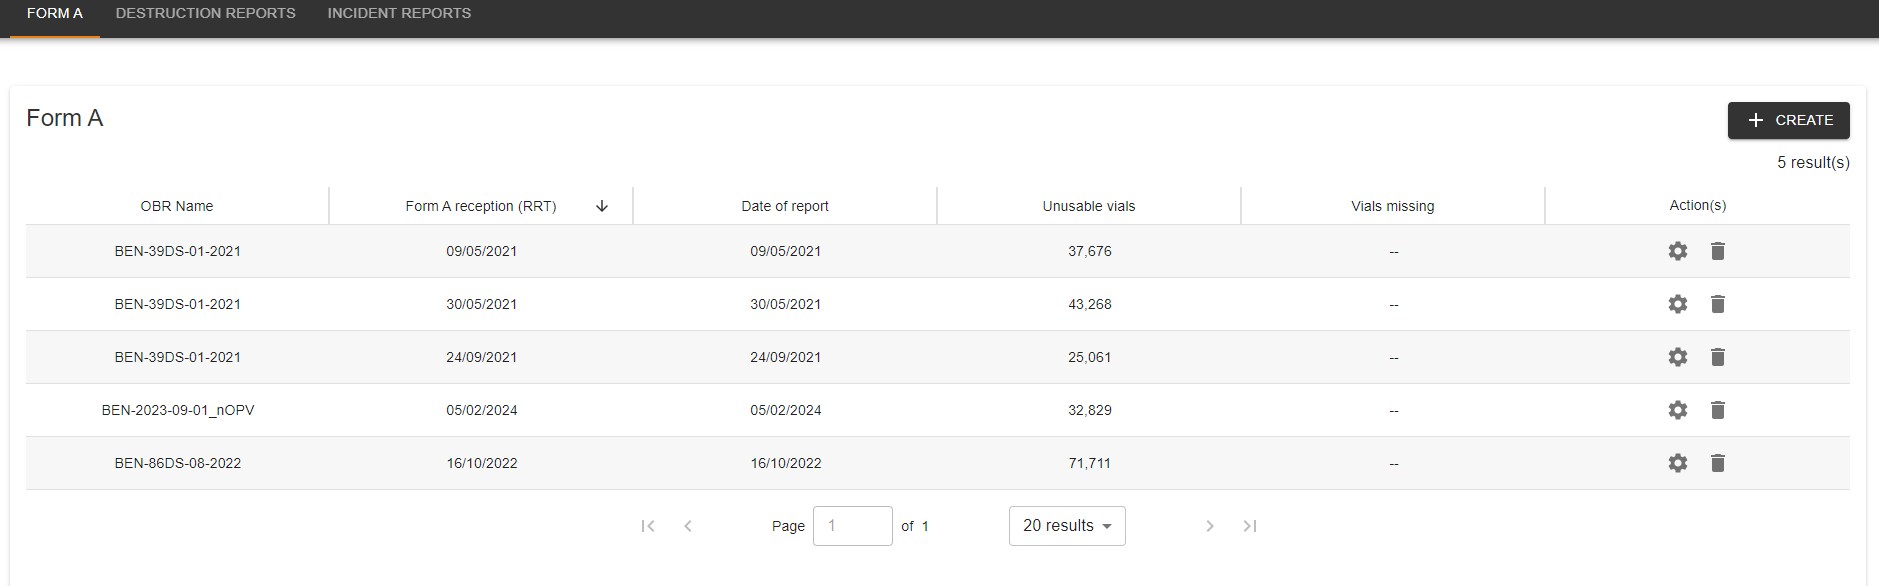
Form A
Create a new Form A entry by selecting the icon ‘Create’ at the top right. Please enter the following mandatory information
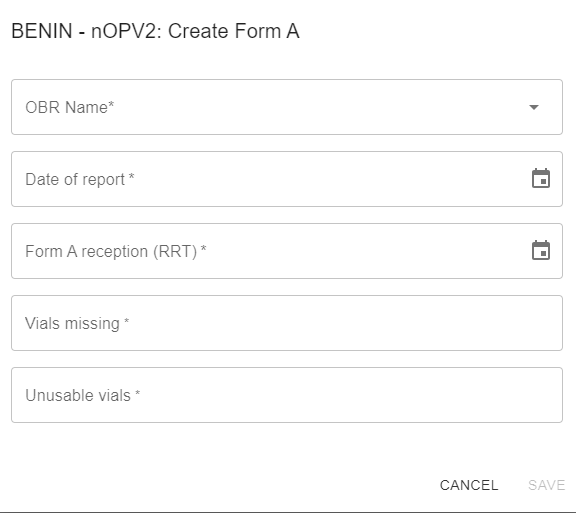
-
OBR Name: Select the correct OBR associated to the country
-
Date of Report: enter the matching date, using the calendar icon on > the right > (
)
> or enter manually in the format DD/MM/YYYY -
Form A reception (RRT): enter the matching date, using the calendar > icon on the right > (
)
> or enter manually in the format DD/MM/YYYY -
Vials missing: enter amount
-
Vials used: enter amount
Once filled, save at the bottom right of the pop-up. You will then be able to see the created Form A entries in the stock variation.
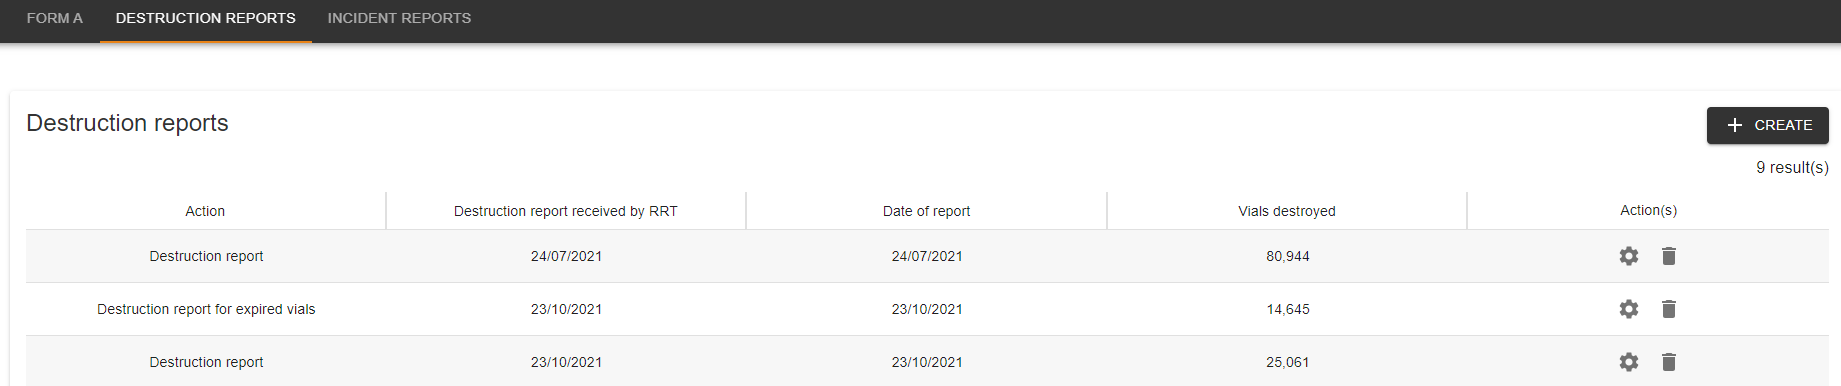
Destruction Reports
To enter a destruction report entry, navigate to the second tab on the top left of the window. Create a new entry by selecting the icon ‘Create’ at the top right. Please enter the following mandatory information:
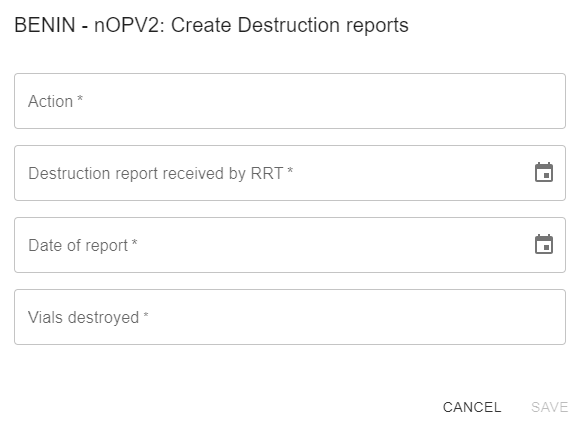
-
Action: Enter the associated destruction in this open field
-
Destruction report received by RRT: enter the matching date, using the calendar icon on the right (
)
or enter manually in the format DD/MM/YYYY -
Date of report: enter the matching date, using the calendar icon on the right (
)
or enter manually in the format DD/MM/YYYY -
Vials destroyed: Enter the associated vials destroyed in this open field
Once filled, save at the bottom right of the pop-up. You will then be able to see the created Destruction Report entries in the stock variation.
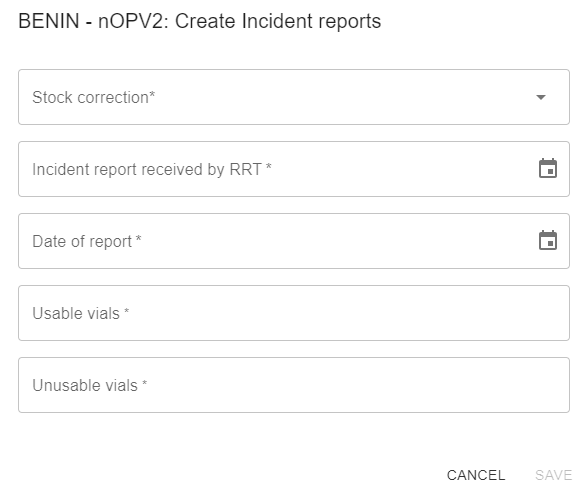
Incident Reports
To create an incident report entry, navigate to the third tab on the top left of the window. Create a new entry by selecting the icon ‘Create’ at the top right. Please enter the following mandatory information:
-
Stock correction: select from the dropdown
-
Losses
-
Physical inventory
-
Return to supplier
-
Theft
-
Vaccine expired
-
VM reached discard point
-
-
Incident report received by RRT: enter the matching date, using the calendar icon on the right (
)
or enter manually in the format DD/MM/YYYY -
Date of report: enter the matching date, using the calendar icon on the right (
)
or enter manually in the format DD/MM/YYYY -
Usable vials: enter amount of vials
-
Unusable vials: enter amount of vials
Once filled, save at the bottom right of the pop-up. You will then be able to see the created incident report entries in the stock variation.

You may then return to the stock details of the country by pressing the arrow at the top left corner. The stock balance of the country, of which you have just inputted, can be viewed in terms of usable/unusable vials and doses at the top left of the screen.

You may toggle between the usable and unusable tabs to view vial information. As displayed in the table below.

Virus Notification#
This section of the platform provides the ability to manually enter or upload virus notifications across countries.
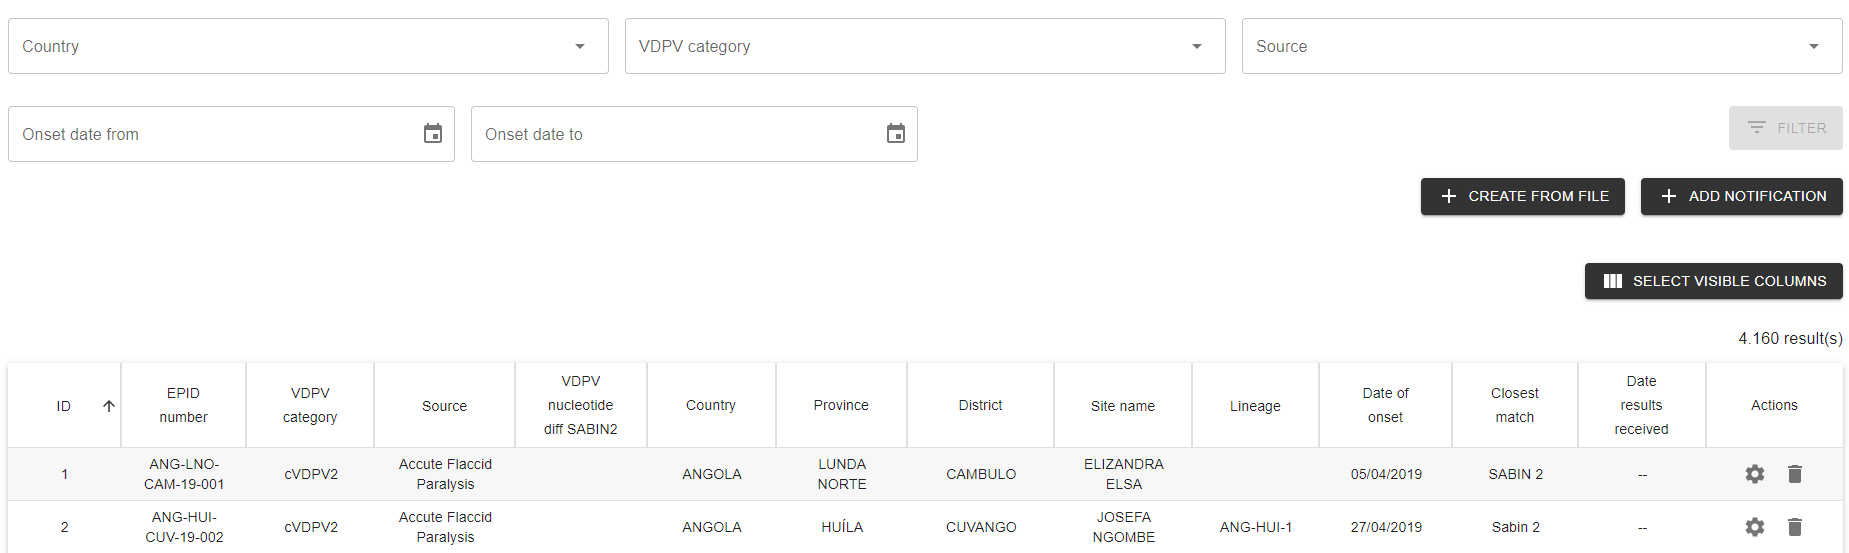
The filters at the top of the page allow the user to select the country of interest, choose a VDPV category, the particular source, and filter on the onset day from/to.

Importing data and uploading it to the platform#
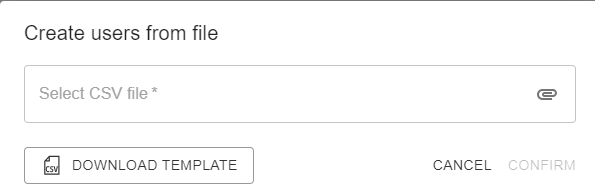
In order to import data and upload it onto the platform, click on the icon ‘create from file’ at the top right of the screen.

The following pop-up will appear, allowing you to ‘Download Template’ of the standard file at the bottom left.
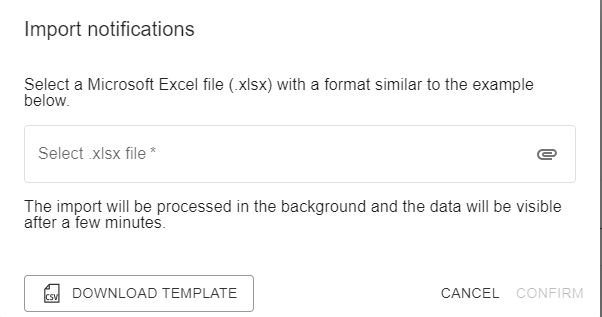
The template includes the following columns to input:
-
EPID Number
-
VDPV Category
-
Source (Acute Flaccid Paralysis, Contact Case, Community, Contact, Environmental, Healthy Children, Other)
-
VDPV Nucleotide Diff SABIN2
-
Country
-
Province
-
District
-
Site Name/Geocode
-
Date collection/date of onset
-
Lineage
-
Closest match VDPV2
-
Date results received
Once the template has been filled out, upload the file using the “select .xlsx file” selection in the popup and confirm the file upload at the bottom right of the window.

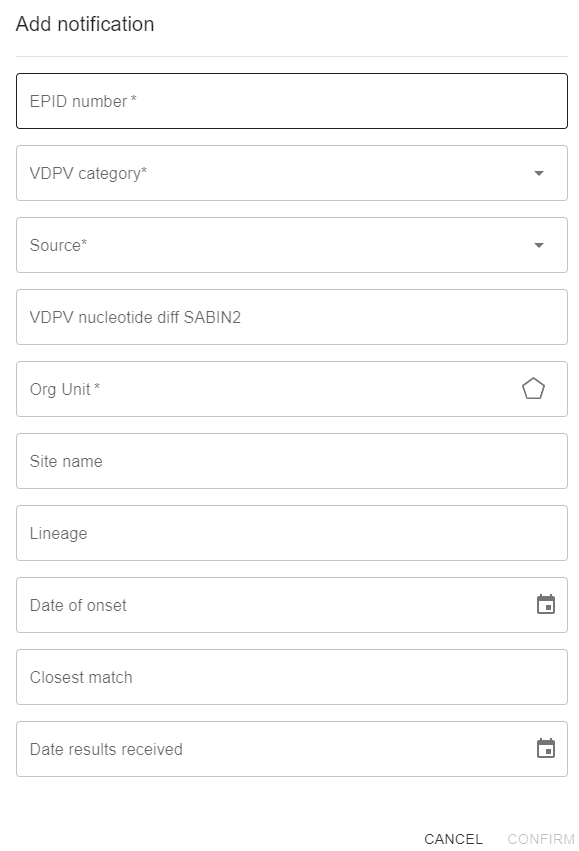
Adding individual notifications#
If the user would like to manually create a notification entry rather than upload a file, select the ‘Add notification’ button at the top right of the Virus Notification window.

The following pop-up will appear. You may fill in the the following fields:
-
EPID Number: enter the corresponding number (mandatory)
-
VDPV Category: select the correct category in the dropdown (mandatory)
-
Source: select the correct source in the dropdown (mandatory)
-
VDPV Nucleotide Diff SABIN2: enter number
-
Org Unit: select the corresponding country, province, and district (mandatory)
-
Site Name: Enter site name
-
Lineage: enter lineage
-
Date of onset: enter the matching date, using the calendar icon on the right (
)
or enter manually in the format DD/MM/YYYY -
Closest match
-
Date results received: enter the matching date, using the calendar icon on the right (
)
or enter manually in the format DD/MM/YYYY
Once the information is filled out, you may save the entry by pressing confirm at the bottom right of the pop-up.
To edit entries, simply click the settings icon on the far right column of the home Virus Notification page. You may additionally utilize the trash icon should an entry need to be deleted.
Admin management#
Managing existing users/Creating a new user#
Users who have admin rights have the ability to create new users and to manage the existing ones.
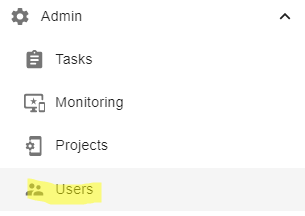
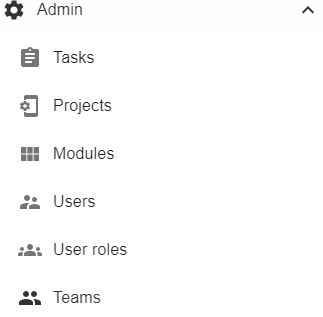
In order to do so, they need to access the “Admin” tab in the menu:
Once in the Admin menu, select “users”:
On the “Users” landing page, you can use the search bar with keywords to find the users accounts you would like to edit. Other filters include permissions, Org unit types, projects, user roles, location, and teams.
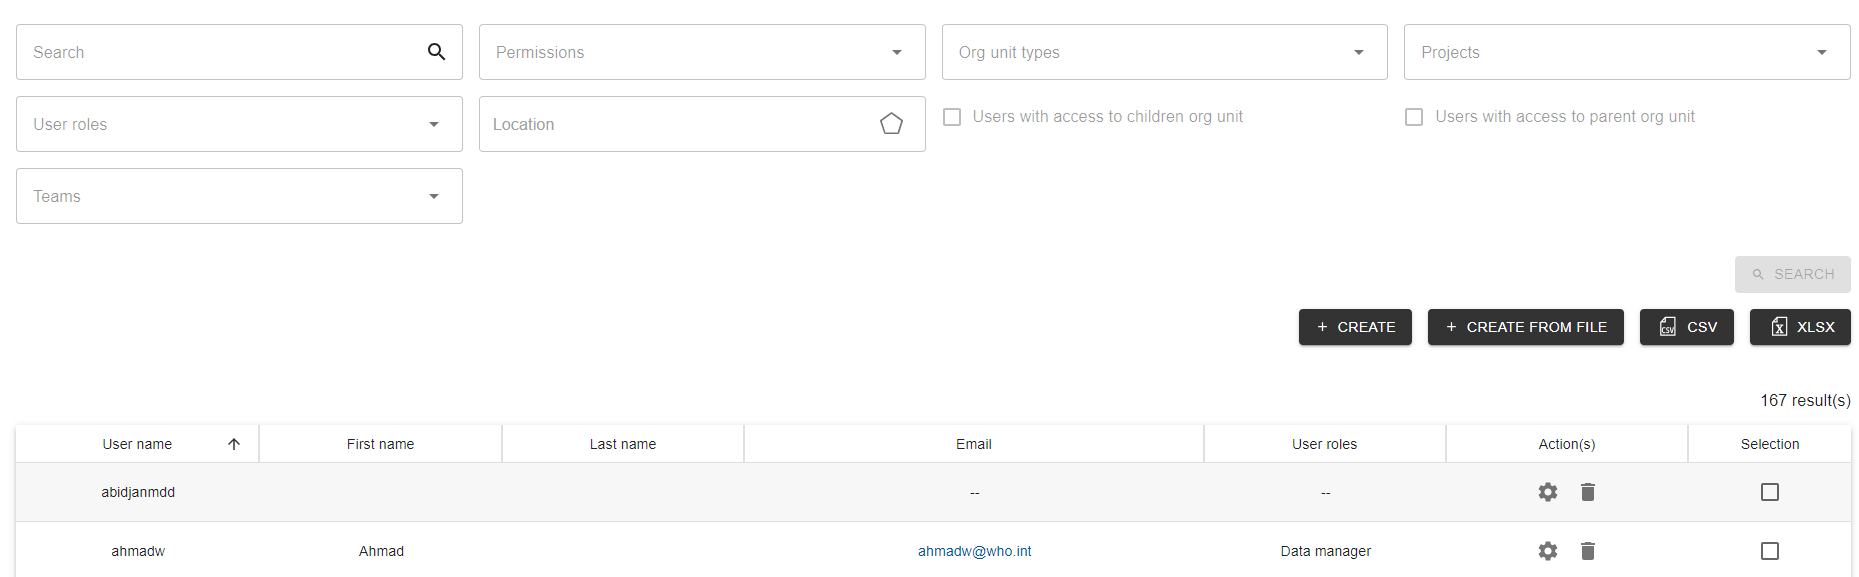
Once you have found the user, you can click on the “settings” button at the end of the matching line:

You can also create a new user by clicking on the button “Create” on the right hand side.
Or alternatively upload a pre-filled CSV file by pressing ‘Create from file’ template can also be found.

Editing/Creating User Information#
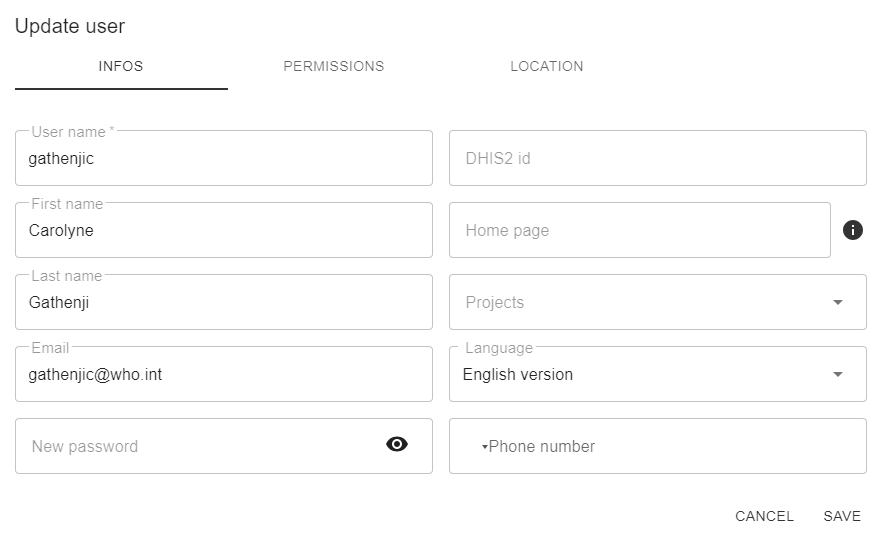
Whether creating a new user or editing an existing user, please fill out the following fields:
-
User name - required field
-
First name
-
Last name
-
Email address
-
Password
-
Language preferred (it will still be possible to change the language in the platform)
-
DHIS2 id
-
Home page
-
Projects
-
Phone number
Please note that there are two other tabs where you can modify the permissions in the platform and the access to information per country/province/district.
Editing the permissions#
This tab allows you to limit the access to specific parts of the platform for a given user. Simple press the toggle should the user receive access to this specific section of the platform

Limiting the user access to some locations in the platform#
The polio OBR platform allows to restrict the access of some users to specific geographies.
This can be done in the tab “location”:
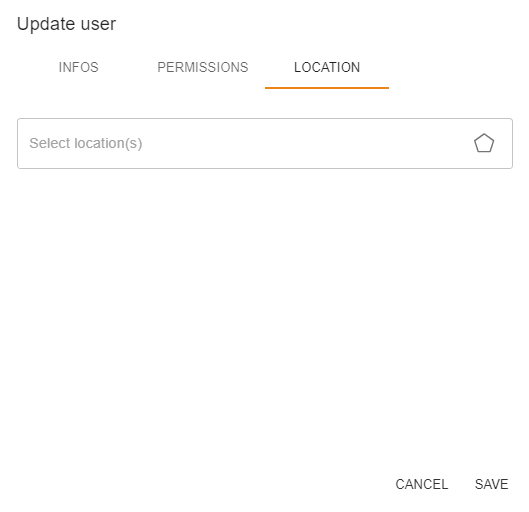
If you leave the field “Location” without specifying a place, the user has by default access to the full platform data (all countries).
If on the contrary you wish to restrict the access of this user to a specific country, or even a specific region or district, you can click on “Select locations” and the geographical information stored in the platform will appear under the form of a tree view:
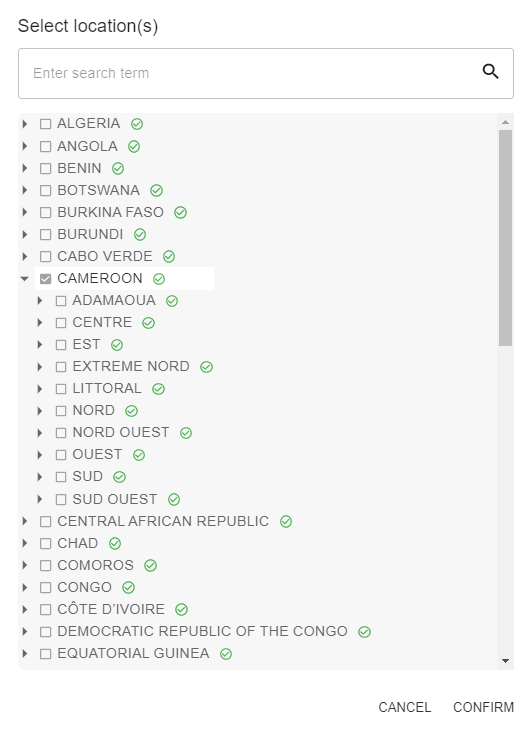
You can also select multiple locations. You can then tick the box(es) matching the level of access you wish to grant to this user. In the above example, the user will only be able to see data linked to Cameroon.
Once you have entered all the information needed for the user, you can click on “Confirm” to save data.
Configuration of automatic email notifications from the platform#
From the menu, if you have admin rights (Permission “Polio campaign admin” when creating/updating a user, see above), you have access to the tab “Configuration”. You can then configure per country some key users that will be on the list of automatic reminders sent by the platform to update data for the campaigns for the country they are attached to.
When landing on the configuration ‘country’ page you have access to the list of countries available in the platform. Each line has a different country, and they are classified by alphabetical order.
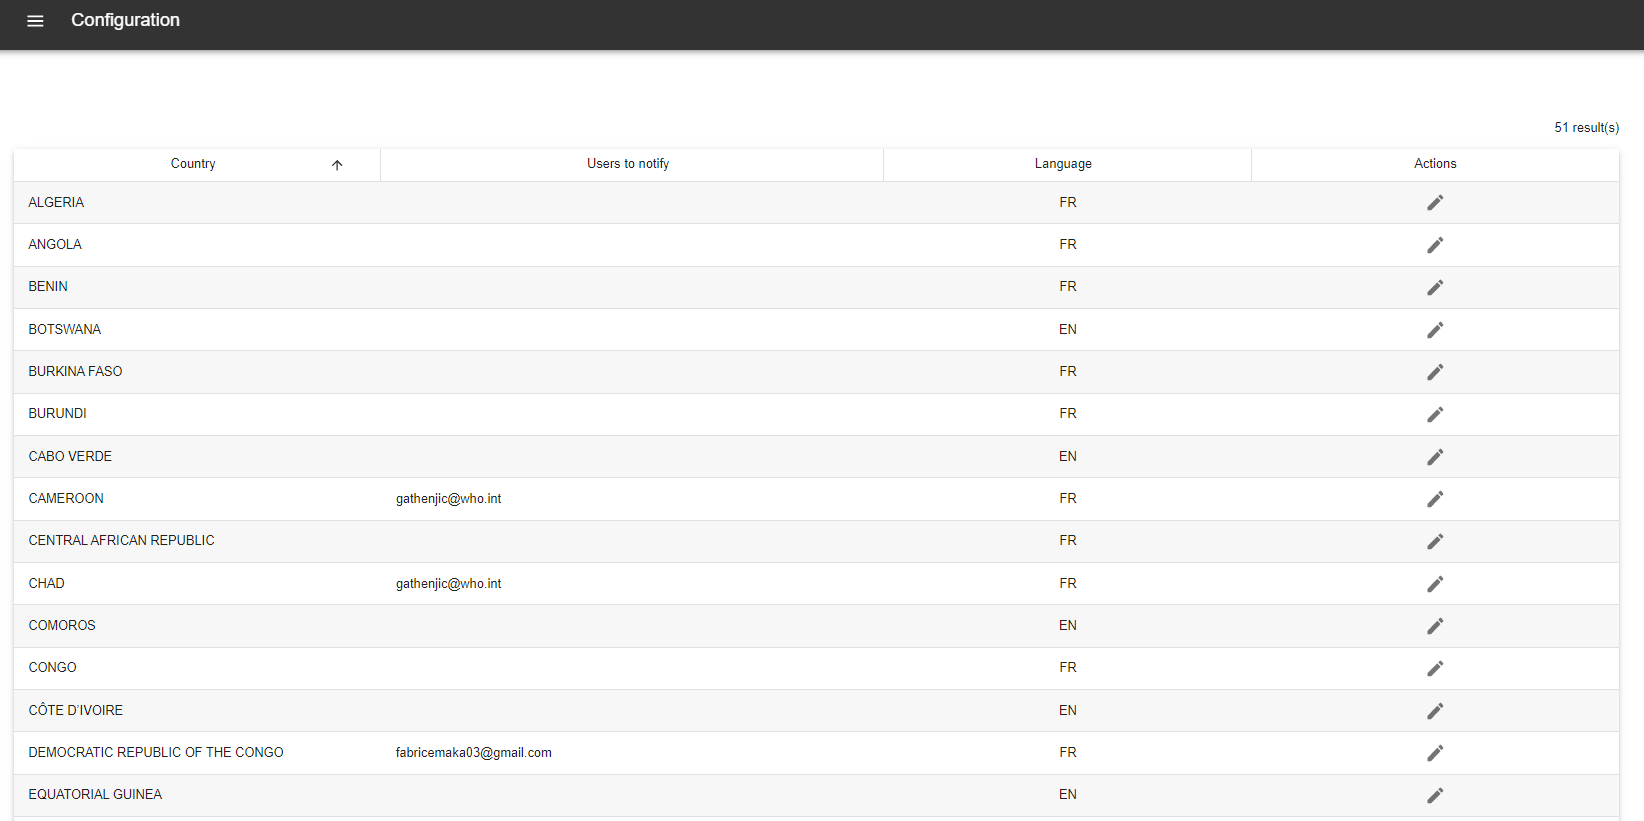
You can use the button “pencil” in the column “Actions” in order to edit data for a given country. A pop-up window appears and allows you to pick in the list one or several platform users that will receive reminder emails to fill in data. You can also select the language for the automatic emails (English or French):
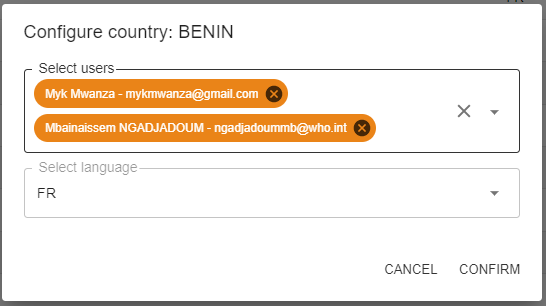
Once finished, you can select “Confirm” to save data.
To cancel, you can click on “Cancel”.
This functionality makes recipients of the emails receive weekly updates about the information as it appears in the platform for a given country. The automatic emails are being sent at night from Thursday to Friday every week.
The standard emails are as follows:
“Dear GPEI coordinator – {country.name},
Weekly status update: Today is day {day_number} since outbreak notification.
Below is the summary of the campaign {c.obr_name}. for more details, visit https://afro-rrt-who.hub.arcgis.com/pages/country-summary
If there are missing data or dates; visit {url} to update
* Notification date : {c.cvdpv2_notified_at}
* First round : {first_round.started_at if first_round and first_round.started_at else ''}
* Vaccine Type : {c.vacine or ''}
* Target population : {target_population}
* RA Status : {c.get_risk_assessment_status_display() or 'Pending'}
* SIA Budget Status : {c.get_budget_status_display() or 'Pending'}
* Date Budget submitted : {c.budget_submitted_at}
* OnSet to Notification (Days) : {onset_days}
* Round 1 to Notification (Days) : {round1_days}
* Prep. national : {preparedness.get('national_score') if preparedness else ''}
* Prep. regional : {preparedness.get('regional_score') if preparedness else ''}
* Prep. district : {preparedness.get('district_score') if preparedness else ''}
For guidance on updating: contact RRT team”
Configuration: Reasons for Delay#
Under the second tab of the Configuration section, you may access the reasons for delay of campaigns.
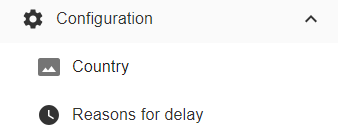
Here, you may edit or create reasons for delay.
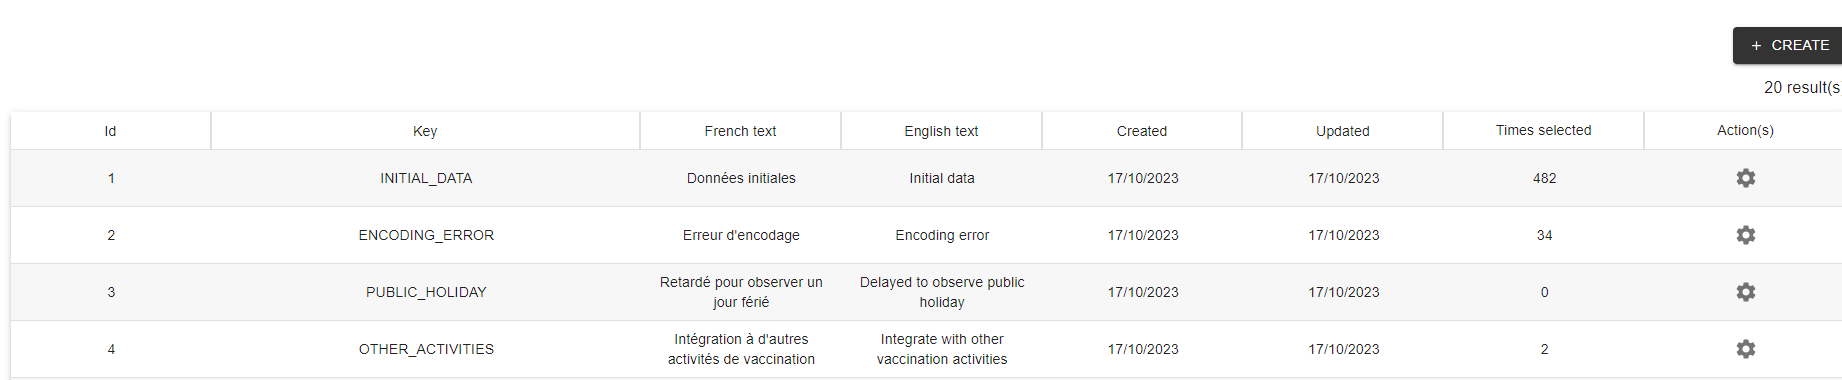
By clicking the button create, you can enter the respective key alongside the English & French text.
Teams management#
From the Admin tab, you can access the “Teams” part:
In this Teams function, you can create teams of users within the platform, at this stage mainly for the budget monitoring tool functionalities (see dedicated section above for more details).
On the landing page, you can see the previously created teams as below:
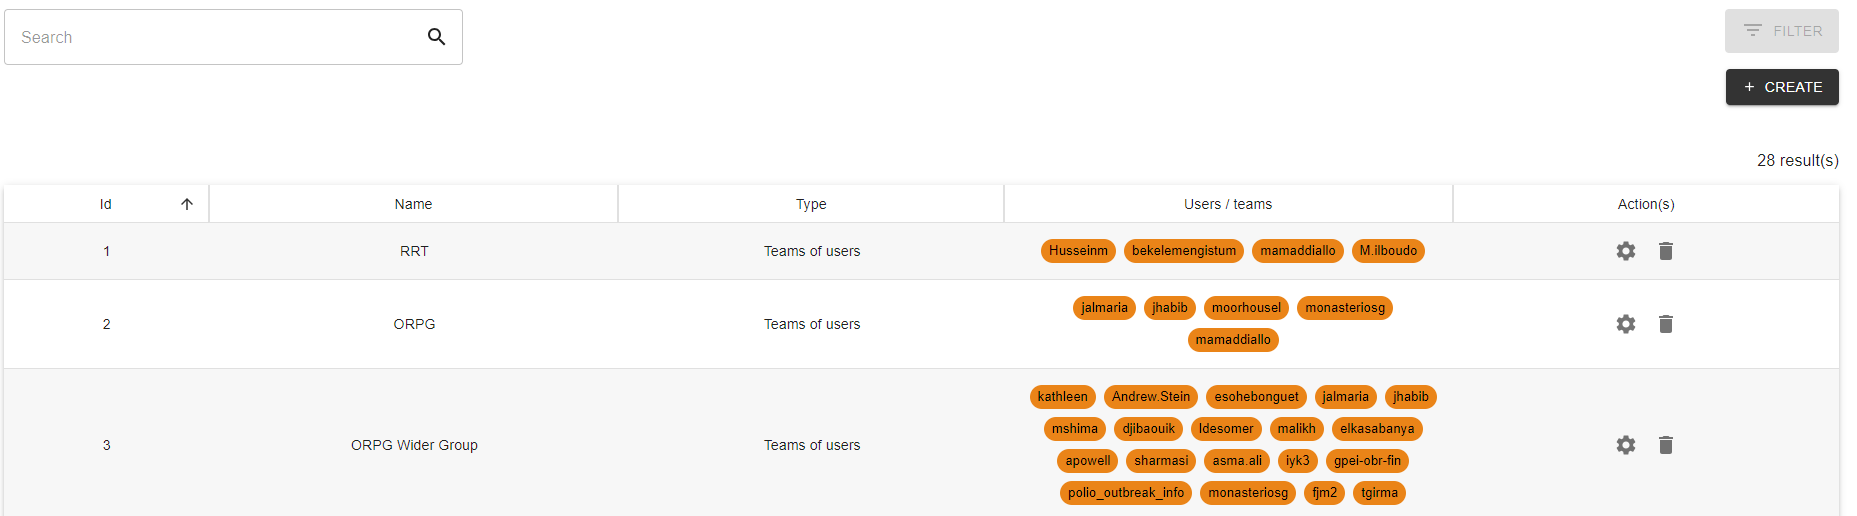
In order to create a new team, you can click on the button on the top right side, “Create”. A window appears as below:
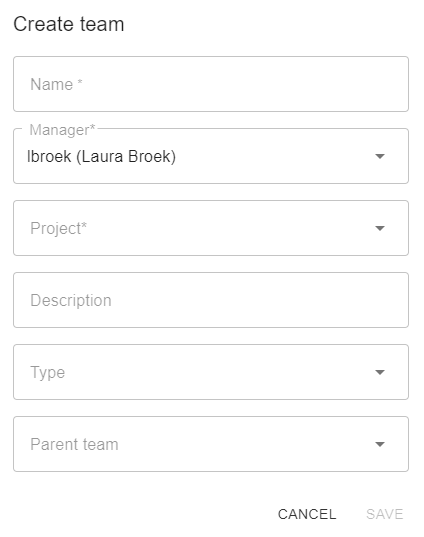
You can then:
-
Name the team
-
Designate a manager (who will be able to edit that team)
-
Choose a project (here, Polio, by default)
-
Describe the team, define the type of users (Team of users or Team of Teams)
-
Select the type
-
Enter the parent team